Showing posts with label Bachelor Cooking. Show all posts

Wednesday, November 4, 2015

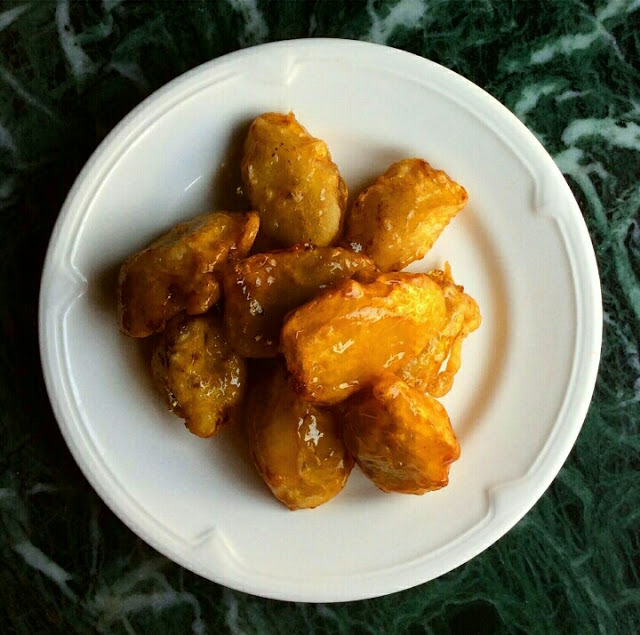
Recipe: Toffee Bananas. An initiative for #SeedTheRiseChallenge by Mahindra Rise.


Some recipes remind you of a certain moment. They take you back in time, and transport you to the exact place, the exact feeling, the exact fragrance. Much like the scene from the movie Ratatouille where the food critic takes one bite of the dish and is instantly transported to his childhood. I have a similar story to share.

When I was a kid, we used to travel by train to and from our native place, Karwar. It was an annual visit for Ganesh Chaturthi, back in the day when all the "modern" things were still not available in villages so we used to carry everything for everyone from Mumbai, and it wasn't possible to take it all on a flight. We used to travel by Nethravati Express as it was one of the only trains that had a pantry. The main reason was the delicious fried Bananas that were sold on the train, fresh out of the pantry, and it was something me and my brother looked forward to every year!

Years passed by, convenience took over everything else and we started taking flights every year. The memories of the fried Bananas got lost somewhere till I was watching an episode of Food Safari on TV and someone cooked Toffee Bananas. It was an instant trip to the train journeys and the happiness. I just knew I had to recreate this.


Call it the perfect opportunity, but #SeedTheRiseChallenge happened just at the right time for me. We are paying homage to the hardworking farmers of India and celebrating with recipes of ingredients that are largely produced on our soil. Bananas had to top the list, and I knew I had to make these! Seed The Rise Campaign is a crowdfunding initiative set up by Mahindra to help improve the lives of Indian farmers who have been betrayed by the bad weather. Working with 5 NGO-led projects across India, the campaign is looking to raise Rs. 2 crores in public donations. What's more - each donation will be matched by Mahindra to double the benefit for the farmers. Check out their website to know more or to donate  http://bit.ly/1ROiYCC. You can also watch their TVC here: https://www.youtube.com/watch?v=rlS2VrSEIdE 

Coming back to the recipe, it is super quick, ready in 30 minutes from start to finish, and is so easy that it is almost unfair for something so easy to be this delicious! Here it goes:

Toffee Bananas
Serves 2
Takes 30 minutes
Recipe credit: Darwin from Food Safari

Ingredients:

2 Bananas
1/2 Cup Flour
2/3 tsp Baking Powder
A pinch of Salt
1/2 Cup Corn Flour, plus a little extra for dusting.
1/3 Cup Cold Water
Oil for frying
1/2 Cup Sugar
Ice, for ice bath.
Method:

Heat a pan for frying, with a level of about an inch of Oil.

Mix the flour, baking powder, salt and corn flour in a bowl. Add cold water and mix the batter by hand, so as to not form lumps. It should be a thick consistency, but also easy to pour.

Chop the Bananas as per preference. I chopped them diagonally into thick slices. Take some corn flour in a plate and dredge the banana slices in it. This helps the batter stick to the otherwise slimy Banana slices.


Once the Oil is heated, coat the Banana slices with the batter and fry till golden on both sides, about 3-4 minutes. Don't crowd the pan with too many slices, as that can lower the oil temperature. 4 slices at once is a good amount! You may need to adjust the consistency of the batter with cold water as you go, it tends to thicken as it sits.

Drain the fried Banana slices on a paper towel. Mean while, heat up the sugar on medium in a non stick pan. Add few drops of water if desired, and wait patiently till it turns into a gorgeous golden caramel.


While this happens, ready a bowl with lots of ice and water and keep ready.

Once the caramel is ready, add few slices of the fried Bananas to it, coat them well and immediately add them to the ice bath. Repeat till all slices are done. The ice water shocks the caramel and turns it into a super crispy exterior.


And that is it! Toffee Bananas are ready. Just imagine biting into these crunchy goodies that are oozing with melt-in-the-mouth Banana goodness inside! I recommend all of you to try it soon! :)
Friday, March 6, 2015

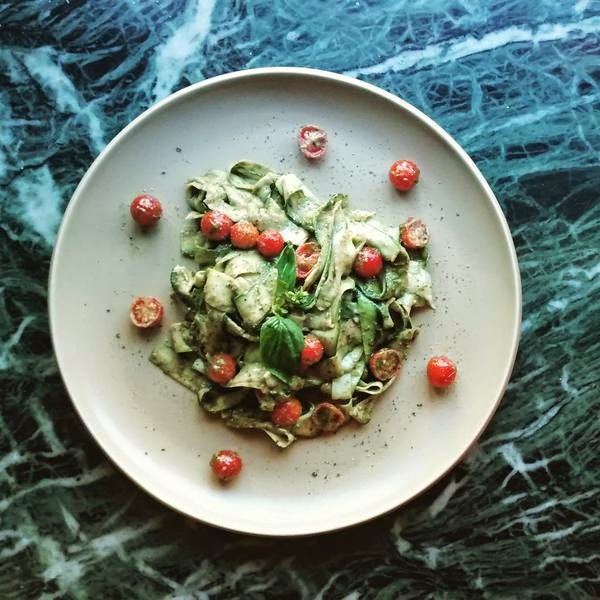
Recipe: Zucchini Fettuccine Salad with a Cashew Pesto dressing.


I am just realizing that my journey with Tata Salt Lite is coming to an end soon. I am so glad I did this, because it got me back my mojo, and it made me feel heard again. I am so grateful for all the love and support I have received from every single one of my readers, and with my blog recently crossing 1,50,000 hits, I have nothing to complain. You guys made this happen. Thank you so, so much. I have to celebrate this with something delicious, but not without my #sLITE change!


I had come across the recipe for Zucchini Spaghetti with Pesto and Buffalo Mozzarella last year over Twitter, and it has been fixed in my mind ever since. I have made numerous excuses to myself, right from Zucchini not being available in the market to 'I-don't-know-how-this-will-taste', from 'I'll-just-make-it-next-time' to 'It's-easier-to-make-an-omelet'. I stand corrected. This is hands down the easiest and yummiest Salad you'll ever come across. Bonus points because it is Vegetarian and a One-Up because it looks like Pasta.

Zucchini Fettuccine Salad with a Cashew Pesto dressing.
Serves 2
Takes 10 minutes

Ingredients:

1 large Zucchini
A handful of Cherry Tomatoes
4 cloves of Garlic
1/4 Cup Cashew Nuts
1 Cup Basil
Tata Salt Lite, to taste
Pepper, to taste
1/2 Cup Extra Virgin Olive Oil

Method:

Use a mandoline, peeler or spiralizer to shave Zucchini into your desired shape. I shaved super thin ribbons and cut them into thirds length-wise for Fettucine sized ribbons. You can also make Spaghetti using a spiralizer. Keep the Zucchini ready into a mixing bowl, in the refrigerator while you make the dressing.

Grind together Garlic, Pepper, Cashews and 1 tbsp EVOO (Olive Oil) until smooth. Then add in the Basil leaves, remaining EVOO and Tata Salt LITE to taste. Grind together till smooth. 

Pour the dressing over the Zucchini and toss to combine. Add in the cherry tomatoes. You can also tear up some fresh Mozzarella cheese if you fancy it. Serve immediately!


Wednesday, March 4, 2015

Recipe: Karwari Style Pan Fried Fish.


For those of you who don't know, I come from Karwar, a beautiful, touristy spot just ahead of the border between Goa and Karnataka (towards Karnataka). I was born and raised in Mumbai, but the annual visits back to Karwar to our ancestral home for Ganpati made sure I could indulge in the beauty of this little town. As a kid, I hated it - I was away from my home, my bed, my people and my life. I had to live in an old ancestral house full of people from everywhere and it was all quite a chore. As time went by, I grew to appreciate the serenity, and now its more of a much needed break from the fast paced city life, where you can just lay back and relax.

I have memories of my aunt cooking fresh Mackerel on the coals, and all of us cousins sitting in one straight line with our legs crossed, and as soon as she'd bring those beautiful fresh charred fish stuffed with homemade masala, topped with a squeeze of fresh Lemon, we would attack with our bare hands and go to omnomnomnom-land instantly. Time has gone by, there is no choolha at the ancestral house anymore, but we still bring some coals and char them Mackerels every time we visit.

Back here in Mumbai, Mom prepares her Signature Fish Curry (Dad won't eat any other) and saves some pieces for Fish Fry. My Dad likes them coated with Semolina Flour, crisp on the outside and loaded with flavour on the inside. I, on the other hand, like it just slathered with Masala, and pan fried with a touch of Oil. It tastes great while being super healthy, and I made a sLITE change by reducing the amount of oil, not coating it with any flour, and using low sodium Tata Salt LITE. I have used Halwa pieces here (Placed both kinds of fried fish, with and without semolina in the picture), but you can use the same Masala for any Fish, Prawns, Squids or even Chicken. Sometimes I eat an entire pan fried Pomfret for Dinner. Its high protein and guilt free, and super easy to prepare!

Karwari Style Pan Fried Fish
Serves 2
Takes 5 minutes (plus 30 minutes prep)

Ingredients:

Seafood of choice, cleaned and portioned (500 gm)
1 tbsp Chili Powder
1/2 tsp Turmeric Powder
Tata Salt Lite, to taste
Few drops of Lemon Juice
Few drops of Water
1 tbsp Oil

Method:

Mix all the dry ingredients in a flat plate. Add the lemon juice, 5-6 drops. Then add water, few drops at a time and mix with your fingers so as to obtain a paste-like consistency. Apply this paste to your seafood and massage thoroughly. Let it sit for 30 minutes in the refrigerator. Please wash your hands after this step, you're working with Chili Powder after all.

Heat up the Oil in a pan on High. Add in the Fish pieces and let them sear, about a minute each side. Once the pieces look like they're browning, turn the heat to low and let them go for 1.5 to 2 minutes on each side. Serve them with a squeeze of Lemon and lots of thinly sliced onions to go with!

Monday, August 4, 2014

Recipe: Thai Curry with Jasmine Rice.


Mothers are truly God's wonders. Other than being intuitive and unconditionally loving, they also have a good amount of 'tough love' going on for us, which is expressed in various forms from a yelling to taunting to sometimes letting you down just so you decide to prove her wrong. Little do we know that it is all a ploy, and while we prove it to her, she sheepishly smiles, for it is her victory. Just like that, Mom pulled me out of bed this Sunday just to tell me that I could not cook a good Thai Curry. I was nagged from step 1 to the final garnish, and when I asked her for feedback, all I received was a silent nod of approval. It was when I saw her go back for seconds (rare occurrence) that I realized I did deliver. She made me cook the Jasmine Rice again for dinner, just to finish the Thai Curry leftovers. I'll take that as a compliment!

Thai Curry
Serves 4-5
Recipe: Self/Various/Based on trial and error

Ingredients:

For the Curry:

4 Tbsp Thai Curry Paste (readily available in markets)
3 Tbsp Oil
1 Lemongrass Root (Optional)
2 Cups Diced Assorted Vegetables (I used Brinjal, Cherry Tomato, Baby Corn, Baby Onions. Mushrooms, Zucchini and Asparagus work great too!)
2 Cups Coconut Milk
1 Cup Prawns, de-veined, with tails on. (You can add Chicken or Tofu or Soy Nuggets)
1 tsp Palm Sugar/Sugar
Fish Sauce, to taste
2-3 Kaffir Lime Leaves
2-3 Basil Leaves

For the Rice:

1.5 Cups Medium Grained Rice
3.5 Cups Water
1 Jasmine Tea bag
Salt, to taste.

Method:

For the Curry:

Heat up Oil on a medium high pan, add in the Thai Curry paste. You can use the Green or Yellow or Red paste, as per your liking. Be careful as this will splatter. Cook thoroughly till you can smell the fragrance.

Add in the Vegetables and toss them well till coated. Keep mixing them around for 2 minutes. If you are making a Chicken/Tofu/Soy Nugget Thai Curry, your protein will go in at this stage. Mix for 2 extra minutes.

I used the Coconut Milk powder to make my Coconut milk. I made a cup and half of thin Coconut milk and a cup of thick Coconut Milk. If you're using the canned stuff, that is already thick enough, so use 3/4 Cup of thick canned Coconut Milk and dilute it with 3/4 Cup of warm water to make thin Coconut milk.

Add the thin Coconut milk to the vegetables and mix well. Turn the heat to medium low. Add the Sugar/Palm Sugar and mix. Leave the spatula in your gravy to avoid any splitting or curdling.

When the curry comes up to simmer, add in the prawns. Cover and cook for 3 minutes (you will still cook for these 3 minutes even if you do not add the Prawns). Finish with the thick Coconut milk, and check for seasoning. Add Fish sauce as per taste. Final flourish would be hand-torn leaves of Basil and Kaffir Lime.

For the Rice:

I cooked my rice in a pressure cooker. Simply throw all the ingredients in together and cook till done, about 20 minutes.

If you are making rice in a normal pan then I suggest boiling water first (use 4 cups water if cooking without pressure cooker), when it starts to boil, add in the tea bag and salt, and let it come to a vigorous rolling boil. Add in the rice and cook with the lid on until done, about 17 minutes on a medium low flame.

Discard tea bag before serving.

Enjoy!

Saturday, May 31, 2014

Recipe: 'Finger Lickin' Good' Southern Fried Chicken.


I am not going to write an intro for this recipe- it does not need one. What you do need to know is that it is a 100% crowd pleasing recipe! I taught this one at a cooking class but I have been receiving too many requests for the recipe, so here it is!

Finger Lickin' Good Fried Chicken
Serves 6
Recipe: Self

Ingredients:

Marination:
1.5 kg Chicken, cut into big pieces. (12 pieces)
4 Cups Buttermilk
1 tbsp Red Chili Powder
1 tsp Pepper
Salt to Taste

Coating:
Panko Crumbs for coating (you can also use tough bread, or 'butter' that is available at khaari shops in India)
1/2 Cup All Purpose Flour
1/2 tsp Oregano
Canola/Sunflower Oil for Skillet Frying

Seasoning:
1 tbsp Caster Sugar
1/2 tsp Red Chili Powder
A pinch of Salt and Pepper.

Method:

Mix all ingredients for the marinade and add the Chicken to it, let it chill in the refrigerator overnight, covered. You cannot skip this step. The Buttermilk really does all the magic overnight. (giving it the omnomnomnomy feeling)

Heat 1 inch Oil in the frying pan. In a flat dish, mix the ingredients for the coating. Coat the chicken pieces thoroughly and let them rest for 10 minutes on a wire rack. In a separate dish mix ingredients for the seasoning and have them ready.

Fry the chicken pieces till tender, mine took around 12 minutes (6 minutes each side) to turn a lovely golden brown colour. Drain on paper towel and sprinkle the seasoning evenly on the Chicken pieces.

Serve them with Waffles and drizzle a lot of Syrup, or serve them as is!

(and thank me later)

P.S. They can be reheated in the oven at 150C for 5 minutes.


Friday, March 14, 2014

Recipe: Taking Idli to the next level : Dahi Idli


Hopping on the 'healthy eating' train has taken a toll on my blog. I have been avoiding food reviews like the plague just because I have been trying to work out and lose all those excess pounds that come free along with the free food and drinks involved. I have decided to limit myself to no more than 2 food reviews in a month. Just as I make my own food at home every day, I need to keep things interesting for myself since it is easy to get bored of eating the same thing. Idlis are something that are both healthy and yummy and I can never get enough of them. But one way to experiment with these is to make Dahi Idli. Ah, the thought of chilled Dahi Idli on a hot summer day! Here is my version for the recipe:

Tuesday, July 23, 2013

Borscht is the Boss. Pretty Red Soup for Wellness.


No, don't cringe like that, I know most of you hate Beetroots but this soup is a game changer. I have been trying to eat healthy (now that's one race I will be running forever) and I have to keep mixing things up so that I stay amused and intrigued towards what I am eating, much like a stubborn kid.

I was watching Fox Traveller on TV this morning and one of my most favorite shows to watch is Food Safari, and in the Poland special they showed the recipe for this soup and I knew I just had to try it out. Don't you just love it when you have all the ingredients from the list in your pantry?

Borscht
Source : Food Safari on Fox Traveller
Serves 4
Ingredients :
300 gm Beetroots, peeled with trimmed ends
1 small Potato
1 small Onion/1 Shallot
1 Zucchini
1 Cup of Yogurt
Juice of one small Lemon (4 tsp)
Salt to taste
Sour Cream/Hung Curd for topping
Dill Leaves/Coriander for garnish
Water

Method:

Boil/Pressure cook Beetroots and Potatoes in some water until tender.

Blitz them in the blender along with the water, and all the other ingredients roughly chopped, except the ones for topping and garnish. (You may roughly chop the Cucumber with skin on).

Pour into a bowl and top with a dollop of Sour Cream and sprinkle Dill or Coriander leaves over the top. Easy? Healthy?
Enjoy! :)

Thursday, June 20, 2013

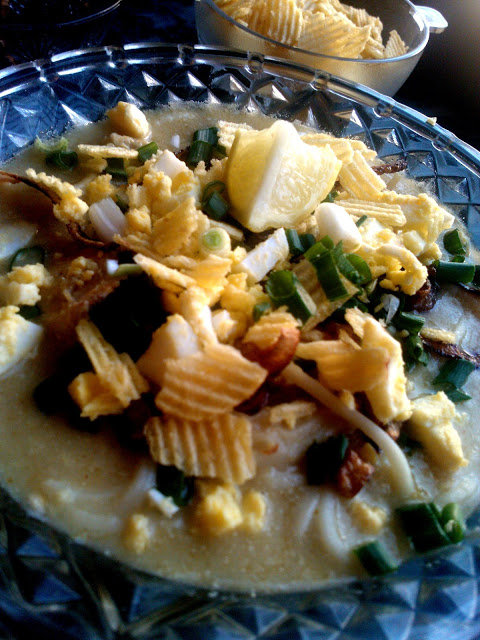
Reaching new heights of NomNom-Ness with a very simple Khow Suey!


I have been writing about food reviews constantly for the past few months and it is about time that I put up a recipe! Life has been so busy with education, work, and everything that has been shifting my focus from cooking. As I slowly regain my balance, here is a recipe of one of my most favorite dishes to eat, the one which makes you feel that everything is going to be okay. Now I know there are many versions of this dish but here is mine. Say hello to my Burmese Khow Suey!

Burmese Khow Suey
Source : Various
Serves 4

Ingredients :

1 kg Chicken (Replace with mixed Veg for Vegetarians)
5 Medium Onions
10 Pods of Garlic
6 Dry Red Chilies
1 tsp Fish Sauce (Optional)
4 Tbsp Gram Flour
220 ml (1 Cup) Coconut Milk
2 Bay Leaves
5 Black Peppercorns
An inch of Cinnamon stick
1 pod Black Cardamom
4 Cups Boiled Noodles (Egg Noodles or any other. Rice will also do)
1 Tbsp Oil
Salt to taste

Condiments:

Fried Garlic
Fried Onion
Chopped Spring Onions
Chopped Boiled Eggs
Potato Chips
Chopped Green Chillies in Vinegar
Lime Wedges
Dry Shrimp powder


Method:

Add the cleaned Chicken, Bay Leaves, Peppercorns, a pinch of Salt in a large pot of cold water and bring to the boil. Skim the foam as it forms and cook till Chicken is tender, about 25 minutes. Save the stock and shred the Chicken. Discard bones.

Pulse together the Onions, Garlic and Dry Red Chilies into a paste. Heat up the oil on medium heat in a deep pan and fry the paste until brown. Add in the Chicken and the Fish Sauce. Stir to incorporate.

Make a paste with Gram Flour and 3/4 cup of stock. Add to the mixture and stir. Turn heat to low and add the Coconut Milk. Season as required. That is it!

A tip : Toss your boiled noodles in a teaspoon of Oil when they are warm to avoid clumping and sticking! 

Condiments : Khow Suey is all about the condiments. Have all your condiments ready and assembled near you and mix and match to your heart's content!

Serve HOT!  


Friday, January 18, 2013

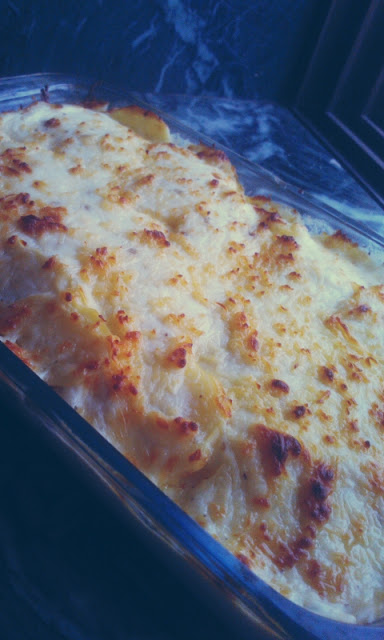
Vegetable Au Gratin. Coz my Mother craves for exotic food.


I think I've completely taken after my Mother, especially in the department of having hunger pangs. These hunger pangs are rather specific and detailed, such as having Pav Bhaji but only from Amar Juice Center during peak hours of traffic. I wouldn't blame her

Wednesday, January 16, 2013

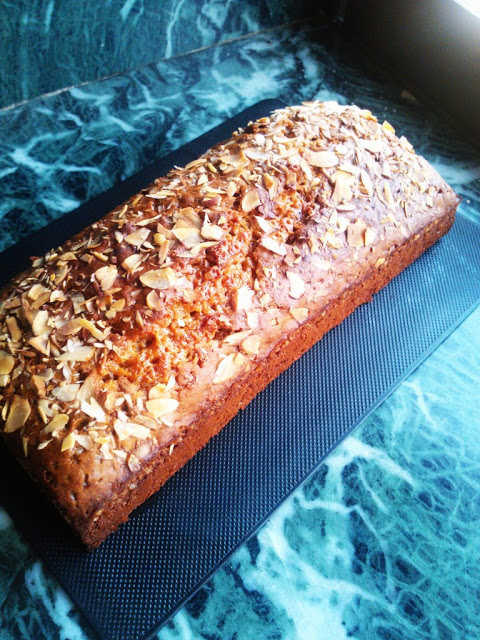
No Oil/Butter Fijian Honey Cake.


I cannot "diet" to save my life. Crash dieting and starvation is not my way to fitness nor have I ever been able to stick to it, and no one should. In the past year I have learned to accept myself for what I am, and work around it to make myself better. If there was one thing that I had to state which was a bad habit of mine with regards to eating healthy, I would definitely say that it is when I absolutely need

Tuesday, November 27, 2012

Spaghetti in Lemon Cream Sauce. Quick, Easy, and of course, Delicious.


After all that festive mithai eating and binging on Indian food over this Diwali, there was a desperate need to eat something light yet creamy, not overloaded with spices yet flavorful, and that is how this dish happened. Lemon and Butter is the kind of combination that can never go wrong in my opinion, unless you manage to get some Lemon in your eyes or burn down the Butter to bits that are darker than the usual brown. If you haven't been a part of kitchen

Tuesday, November 13, 2012

Bettering Breakfast #9 : Of Ambarsar, The Golden Temple, Peace and Paranthas. (AKA Parantha Making 101)


Last month I took a trip to North India. It was a work thing which mostly kept me busy throughout my time in New Delhi but what made the trip totally worth it was the 2 day getaway to Amritsar, or Ambarsar as it is lovingly called. Amritsar is home to the famous Golden Temple, and is the kind of place where one has to face oneself and go through self evaluation. Watching those beautifully huge Koi swim in the water where you also see your reflections only makes you realize that the most important things in life are fairly simple. We over-complicate everything.


 Incidentally we visited the Temple on the Birthday of Guru Ram Das, and we got to witness the overwhelming crowd as well as an Aerobatic show

Monday, November 12, 2012

Baked Herbed Garlic Potato Wedges with a Homemade Gravy. Coz that is how I recommend you try it.


French Fries available in India feel like they are half heartedly done. I underwent the life changing experience of having Fries with Gravy during my stay in Canada and now that I am back here, French Fries feel incomplete! If it were up to me, I'd go borrow, beg or steal some Rennet from somewhere and make my own Cheese Curds so I could show you guys the ultimate recipe - Poutine (French Fries topped with Fresh Cheese Curds topped with Piping Hot Gravy!).

Saturday, October 27, 2012

Honey Glazed Sesame Chicken. A 'Shop For Change' initiative.


Last month I received a hamper from Shop For Change India who work towards empowering the Farmers and make sure that everything is Fair Trade. Fair trade is a market led solution to poverty which aims to use trade, not aid, to improve livelihoods for disadvantaged farmers and artisans and promote sustainability. You guys should definitely visit their website and check out the awesome initiative taken towards the betterment of the lesser fortunate.

Monday, October 22, 2012

Of where I'm leading to, hours of clarifications and a 30 minute Egg Biryani that shut me up.

Forgive me for in this post, I am going to rant. Since I don't know where to begin, I will try and categorize it. I don't know how many of you actually go through the descriptions and the couple of paragraphs I put up before I put my recipe, but nevertheless, here it is:

Sunday, September 23, 2012

A new look, and a Bruschetta a la Julie & Julia. For cravings that are insanely specific.


I had been meaning to move to a better layout for the blog for the longest time, but call it a creative block or just pure laziness, I could not get my head around to actually sitting down and doing it. But when I did, I spent hours and hours working on it and finally I came up with something that I liked. I hope you like it too! I have enabled preview posts so that the image-heavy post gets shorter and the page loads quicker, and basically just de-cluttered a bit :) Do tell me how you like it. Okay! This pic is too yummy so quickly on to the post!

Some cravings of mine are insanely specific. Like this one. I just got reminded of that one scene from the movie 'Julie & Julia' where Julia makes the most amazing Bruschetta for her husband.

Wednesday, September 19, 2012

Bettering Breakfast # 6 : Breakfast in Bed, Bangkok Style.


The whole motive behind starting this series was because I loved breakfasting and I loved making breakfasts as a whole. The sheer joy of watching someone enjoy their first meal is something that has always made my day. But then I got stuck in routine, making breakfast after breakfast, and there is a point where peoples appreciation turns into assumption and then you hit a creative block. But then I realized that this is all a two way street... and believe me it feels so awesome to be at the receiving end. Amrita from Life Ki Recipe made me a breakfast omelet filled with lots of veggies and so much of Love that, I just had to dig this series out of the grave right away. This recipe has been passed down the line and has been tweaked at every step but from what I hear it originated in Bangkok! So here we go!


Monday, September 17, 2012

Butter Lovers Rejoice! Herb Butter and Green Garlic Butter.


Just in my last post I spoke about the complexity of simplicity. I think this spread is a perfect example of it. Just plain, softened butter, serenaded with Herbs, or alternatively finely ground Green Garlic and Parsley. I don't think this even needs a recipe! But I will try.


Thursday, August 16, 2012

Of Procrastination, Inspiration, Recognition, Friendship, and a resulting Egg Masala.


Sharing is Caring. Whenever it comes to food, especially. I have always been intrigued with this fad of "secret recipes" especially with people who commercially sell their food, but with time and through experience I have learned that sharing it all does not steal anything from you or the way you would cook a recipe. I, for one, do not remember the last time where I would have followed a recipe to the T. I have always done something to add my little twist to it, or gone with my instinct and trusted my gut. There were times where I went against it and tried to stick to the recipes but that has never worked out for me, and the Chocolate Eclair Episode is a standing testimony to that!

What I actually want to convey here is that if you share your knowledge, you are bound to get it back multi-fold. Just like that, my school friend Rashmi (who posts amazing pictures of food on her Facebook Timeline) once put up a picture of Egg Masala. I'll let the picture do the talking here.


After few minutes of ogling at the picture and realizing that I was drooling, I went ahead and asked her for the recipe and like a true friend (True Friends are the ones who share recipes) she immediately inboxed me the recipe. But then I also had to live up to my other duties like playing Queen of Procrastination so it just went down one day at a time in my list of facebook messages and I forgot about it. But thanks to my specific cravings, I was craving for exactly the dish from the picture and I just had to make it. Until I got lazy again.

So I logged on to twitter to rant about how I was not feeling very inspired to cook anymore but I checked my mentions and could not stop smiling ear to ear coz Burrp Mumbai featured me on their list of 6 Foodies to follow in Mumbai, along with some pretty amazing Foodies! Here is the link to the article!


Well, that gave me the much needed push and off I went to the Kitchen!


Egg Masala
Serves 2
Recipe : Rashmi Desai Mehta


Ingredients:
1 Large Onion, Chopped
2 Medium Tomatoes, Chopped
1/2 Cup Mint Leaves, Chopped
1 Cup Corriander Leaves, Chopped
4 Eggs, Boiled
2 Bay leaves
4 Cloves
An inch of Cinnamon
1/2 teaspoon Carom Seeds (Ajwain)
1/2 teaspoon Cumin Seeds
4-5 Curry Leaves
1 teaspoon Red Chili Powder
1/2 teaspoon Turmeric Powder
2 teaspoons Coriander Powder
1 teaspoon Meat Masala (I used Garam Masala instead)
1 Cup (1/2+1/2) Water
Salt, to taste
3 tbsp Oil/Ghee


Method:

Heat Oil/Ghee on medium heat in a pan. Add Bay leaves, Cinnamon, Carom Seeds, Cloves and sauté for a minute.

Next, add in the Cumin seeds, Curry Leaves and the chopped Onion. Sauté until Onions are soft.

Add in the Tomatoes and Mint Leaves and add half cup water. Cook till water evaporates, while stirring occasionally. Do mash the Tomatoes as you go along while stirring.


Add in the Chili Powder, Turmeric Powder, Coriander Powder, Meat Masala/Garam Masala and fry till fragrant (About 90 seconds), then add in the remaining half cup of water and half of the Coriander Leaves. Cook till the gravy reduces to desired consistency, you could add more water if you like.

Finally, add in the boiled Eggs and Salt to taste, (I sprinkled some Garam Masala here too) and Garnish with the remaining Coriander. Serve with Roti/Rice.


I personally felt that it tasted best when it was not piping hot. Have it when its warm and you would be able to savour it better. The aftertaste of the Carom and the Minty feeling is something quite different and you would definitely go out for seconds! Thanks again Rashmi I will be cooking this fairly often now!

Friday, July 6, 2012

Bettering Breakfast #5: Nothing beats a simple Egg and Avocado Sandwich.


Most people I know are the kind who wake up and rush to work, and breakfast can only consist of either cereal for the healthy ones, or leftovers or just some biscuits or crackers along with a cup of Coffee. Especially in India, Moms make breakfast daily as per custom but with modernization and growth, more and more people shift bases due to work and despite having a fully functional kitchen, prefer not to cook either coz of sheer laziness or coz they're too used to be brought fresh breakfast by Mommy dearest. I always encourage people to make their own breakfasts. It's easy, healthy, and would make your day better than you can imagine. One such easy breakfasts to put together is one of my most favorite things to eat, an Egg an Avocado Sandwich.


Egg and Avocado Open Sandwich.
Serves 2
Recipe : Self

Ingredients : 

1 Avocado, Sliced or mashed.
1 Tomato, Sliced into rings.
2 Eggs
2 tbsp Oil
2 Bread Slices.
Butter (Optional)
Salt to taste
Pepper to taste


Method:


Get the Ingredients ready.


Toast the bread in a toaster or on the pan. You can butter them if you like.


Make 2 Sunny Side up eggs with 1 tbsp oil, salt and pepper, one for each sandwich. I like runny yolks but suit yourself. You could also make an omelet or scramble them.


Place on a slice of bread each and top with Tomatoes and Avocado slices. I sprinkle extra pepper on top too! Top with another slice of bread if desired. Enjoy :)


Older Posts Home

LinkWithin