Showing posts with label tatasaltlite. Show all posts

Tuesday, March 17, 2015

Recipe: Sprouted Moong (Green Gram) Falafels!


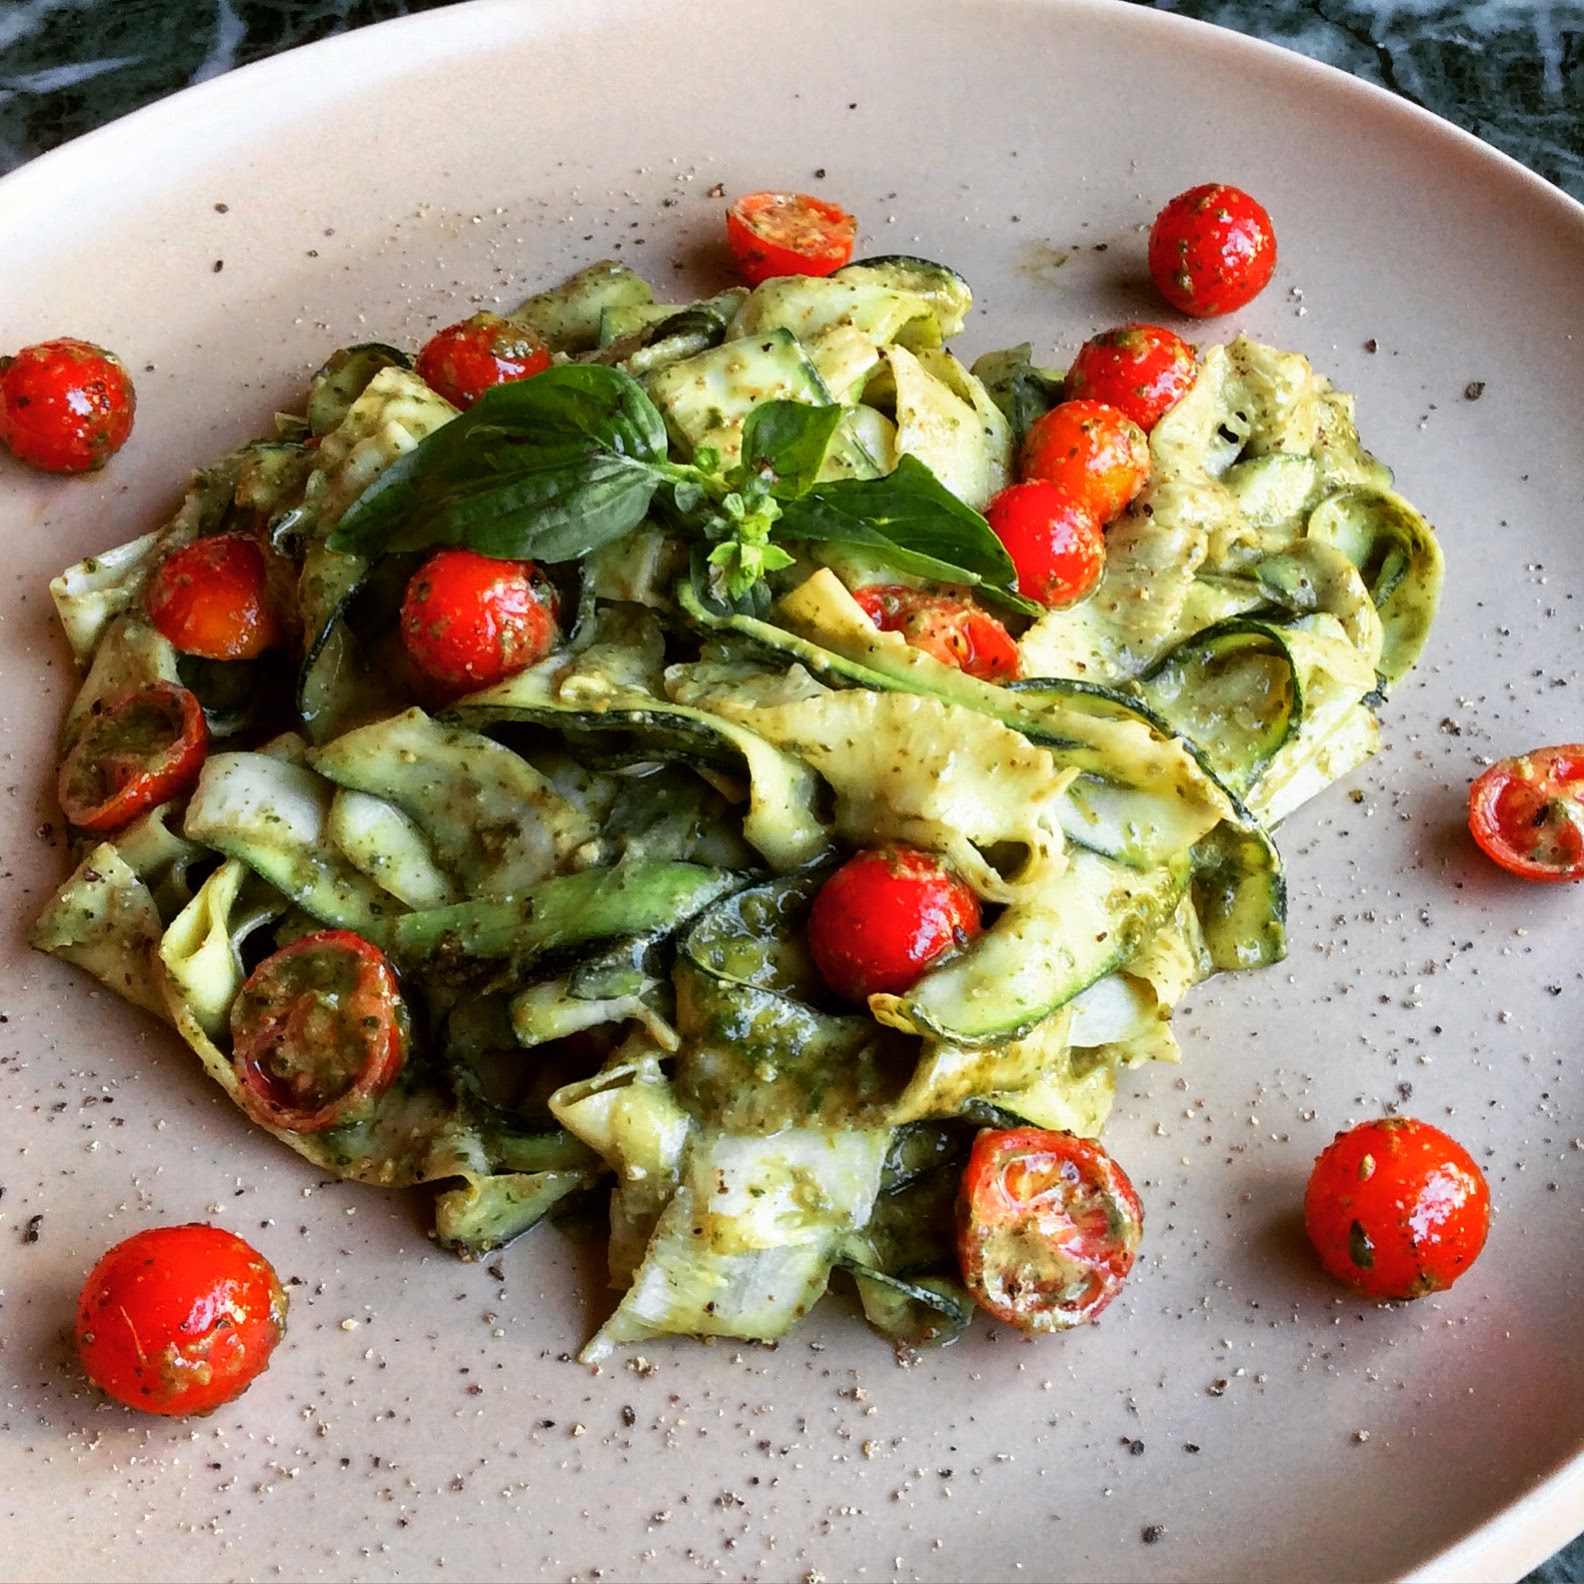
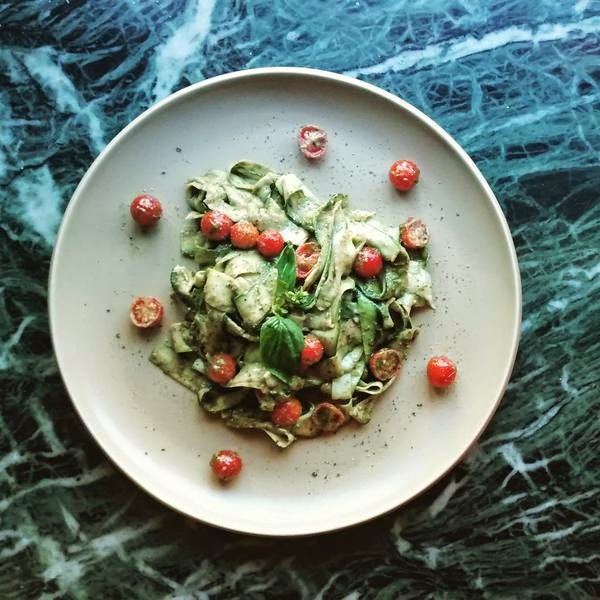
Wow, at the beginning of this journey with Tata Salt Lite I did not know if I would be able to stick to the schedule and be regular with my blogging. This is my last post for #slite and I'm going to miss this so much, that I have decided to stick to Tata Salt Lite from now on. Thank you so much for letting me invent and play around in my kitchen, and discover so much more about myself while doing so! Thank you for also giving me a medium to convey to the world the importance of no sodium salt!

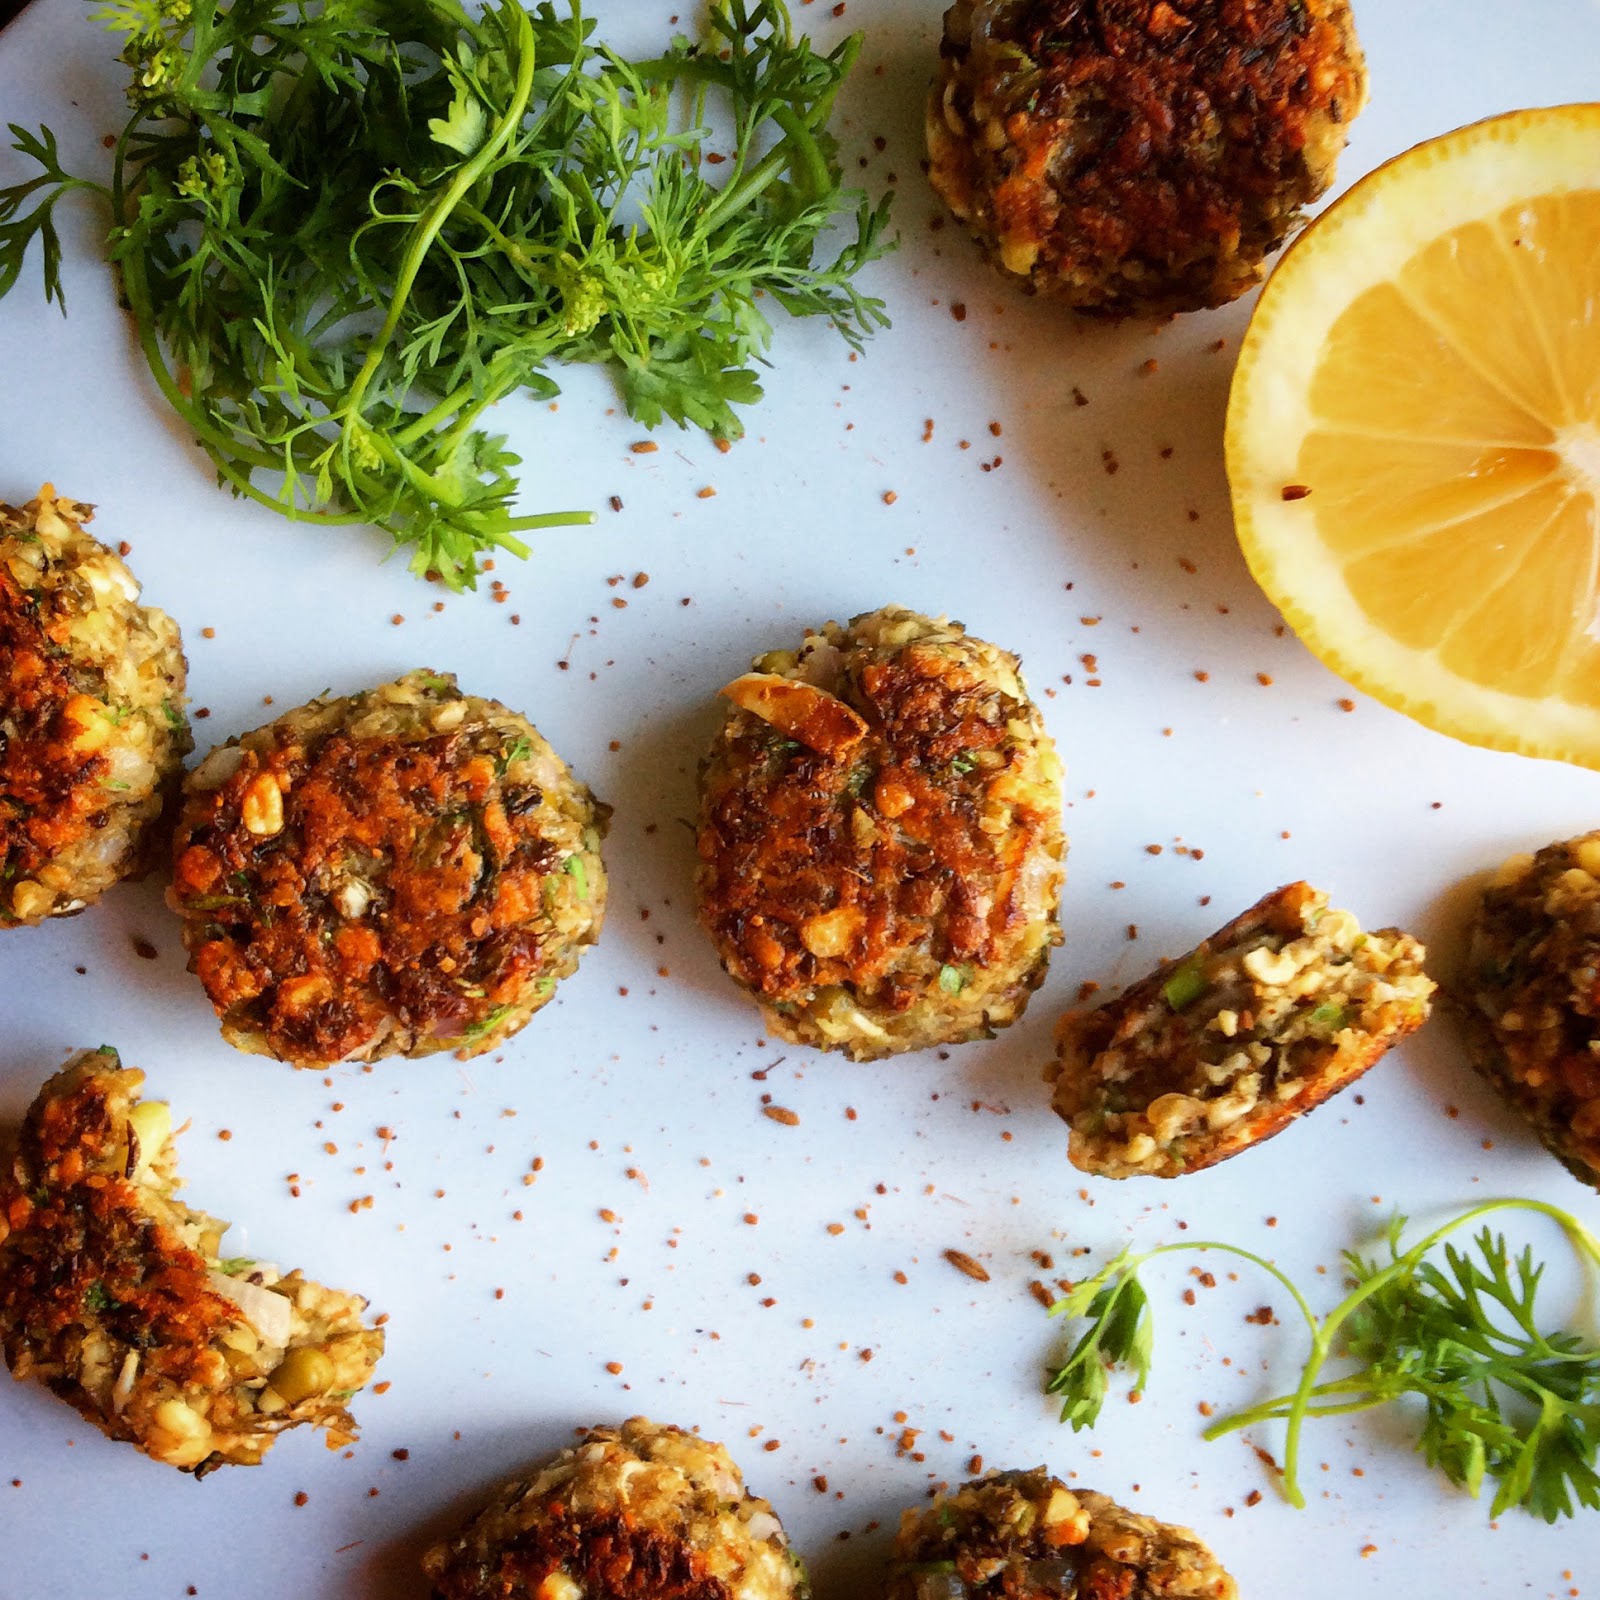
I took few days to think about the perfect last recipe, or a grand finale, if you will. I thought of a Brown Rice Phirni, a Cauliflower soup, an epic stir fry and so many more items. But then I realised I didn't do anything with Sprouts and considering they are such an important part of my daily life, it is unfair to them. So I was brainstorming with my bestie all the way in Singapore, when she mentioned I could make Sprout Falafels. What a brilliant idea! Not to mention how utterly genius this is, it is also insanely healthy, and a good high protein alternative for people like me who get tired of eating Sprouts just as is. It all seemed like it would work out on paper, but nothing is ever sure till you actually execute it so I did a test run. I am so happy with how these turned out! You can either bake them or pan fry them in very little oil, like I did, have it with Hummus, or stuff it in your pita, roti, have it with bread, or just as is!


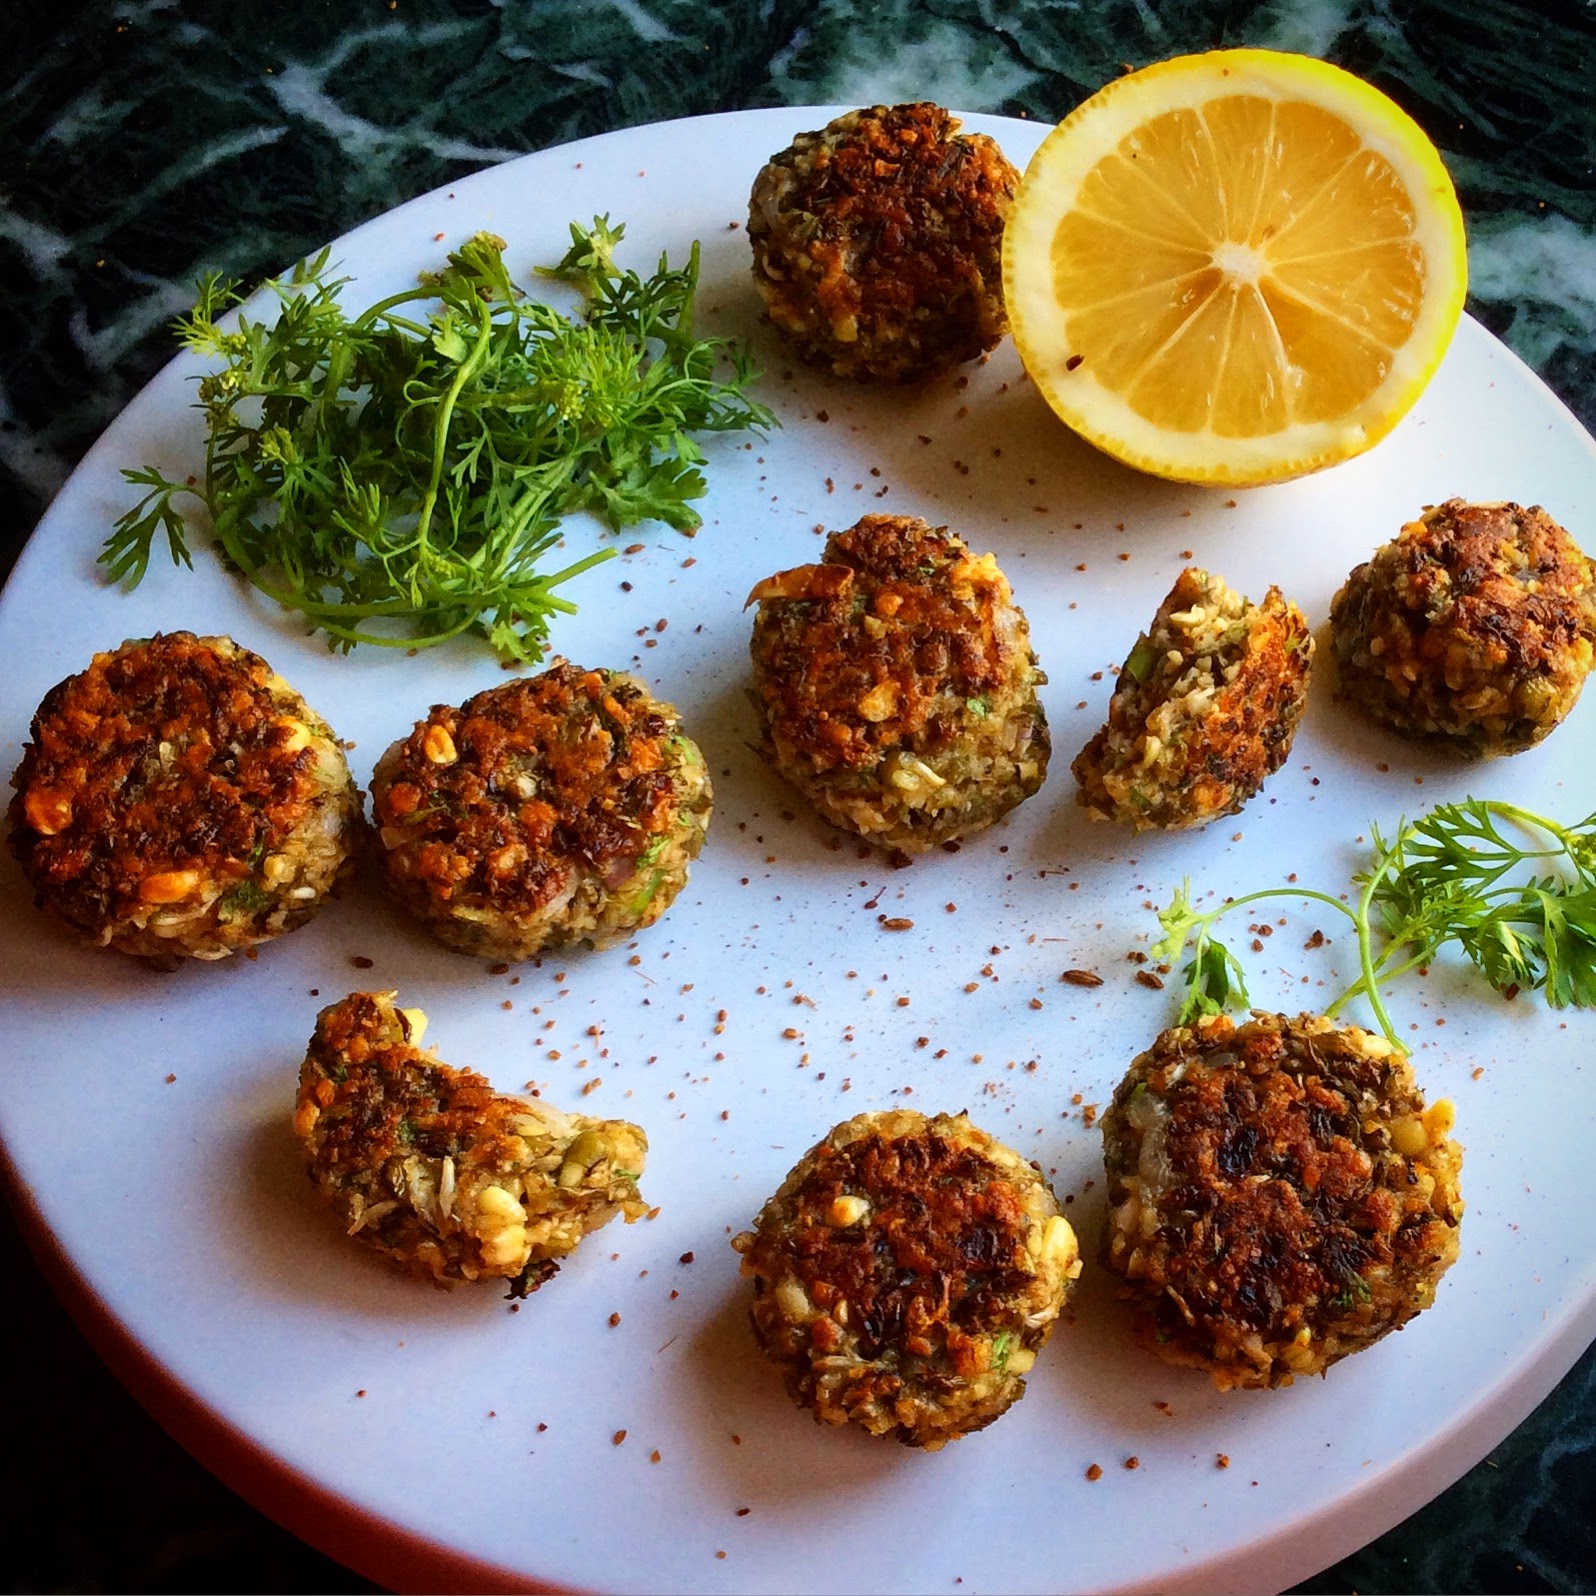
Sprouted Moong Falafels
Serves 2
Takes 15 minutes


Ingredients:

1 cup sprouted Moong/Green Gram. (You can use any kind of sprouts)
5 cloves of Garlic
1/2 an Onion, finely chopped.
A handful of mixed herbs, finely chopped. (I used coriander, mint, parsley)
1 tsp Roasted Cumin powder
Tata Salt Lite, to taste
1/2 tsp All spice powder (can be substituted with brown Garam Masala powder)
juice of half a lemon.
1/2 tsp Baking Soda
2 tsp Olive Oil.

Method:

You can either use lightly steamed Moong or raw Moong for this recipe as you desire. If you want to use steamed Moong, place them in the microwave, sprinkled with some water and microwave on high for a minute. You'll need to let them cool down before proceeding. I used raw sprouts.

Pulse the sprouts in the blender, in short 2 second bursts, till it resembles a coarse powder. We do not want a paste. Remove them in a mixing bowl. Add in the garlic and pulse that as well, add to the sprout mix.

Now throw in the Onion, herbs, and the powders. Add salt and mix everything together.

In a spoon, take the lemon juice and add the baking soda to it. Pour the froth into the mixture and combine everything again. Gently make bite sized rounds of falafel, and place them on a plate. I made 8. Put them in the fridge for 5 minutes.

Heat up a non stick pan on medium high with the Olive oil. Put in the falafel rounds and slightly flatten them. Let them be undisturbed for a minute. Flip them over, lower the flame to medium and finish cooking on the other side, approximately 3 to 4 minutes.

Serve hot!

Thursday, March 12, 2015

Recipe: Instant Oats Lite Dosa


The parents have been out of town for a week now. As much as I'm loving the silence, I am missing them more. Every morning I wake up early only to find that Dad has already woken up and is practising Yoga before he starts getting ready to go to work. When I'm back from the gym, while Dad has already left for work, Mom is warming breakfast up in the kitchen with the TV blasting in full volume in the hall, just so she can hear the dialogues. If it's a Sunday I'd wake up at the same time (I go to the gym on Sunday's, it's empty and you can really get a good workout done) but everyone's asleep. When I return, TV is blaring full volume and Mom is in the kitchen, fixing breakfast. Sunday breakfasts are staple - either it's Idli or Dosa. Followed by Chicken or Mutton curry for lunch, where I'd make more Dosas and eat with the curry. And then it's siesta time, it's only fitting after all the yum overload we go through every Sunday.

I'm not getting my Dosa fix since they're out of town, so I thought of improvising. I love how versatile Oats are, and if you can make Pancakes with them, you certainly can make a good Dosa as well. It's a #slite change that makes your life so much easier, not to forget healthier too! I make 3 different kinds of Oats Dosas, but the recent one I tried is the closest to a real Dosa. I used low sodium Tata salt lite to make it just that touch of extra healthy. You're gonna forget you're eating healthy, it's so good!


Instant Oats Dosa
Serves 2 (makes 6 medium sized Dosas)
Takes 20 minutes


Ingredients:

1 cup Instant Oats
1/2 cup Yogurt
2 green chilies
A handful of coriander, chopped
2 tsp Cumin seeds
2 tbsp Rice Flour (optional)
2 tbsp Semolina flour
Water, to adjust the consistency
Tata salt lite, to taste
Pepper, to taste
Ghee/oil to grease the pan.

Method:

Blend together all the ingredients except Oil, with some water (about half cup).
Let this batter sit for 15 minutes in a bowl. It will get thicker due to the Semolina and Oats. Adjust to a thick, dosa-like pouring consistency with water, add little at one time.

Heat up a pan on medium, preferably non stick. Add a drop of ghee or oil, and wipe the pan surface with a paper napkin so it is spread evenly. Add 3/4 ladle of batter and spread evenly. Add few more drops of Oil down the sides of the pan if desired. I also added some podi to the dosa at this point. You could also add chopped onions and tomatoes if you want this to be an uttappam. Cook on medium flame for 2 minutes.

Be careful while flipping her over, she's a delicate dosa darling! Cook for 30 seconds more and serve hot with chutney, podi, ketchup, or just have as is with a hot cup of Chai!

Tuesday, March 10, 2015

Recipe: Guilt Free Sugarless 70% Dark Chocolate and Baileys Ice Cream.


I am the Ross Geller of the ice cream world. I am not an ice cream lover because I think it is too cold. Soft serves and froyo on the other hand, I love. Back when we were kids, me and the little brother used to re-enact the sequence from the Jurassic Park movie, where the kids are eating ice cream and a Dinosaur creeps up in their house (we've all been there). We'd mix instant coffee powder in a Vanilla ice cream cup and stir it vigorously till it was of soft serve consistency and then race to who finishes last. Nostalgic. Sigh... How time passes by!

As much as I really-really-really don't like ice cream, I crave for it often when it's that time of the month. Same goes for chocolate- not a huge fan, but I want nothing but chocolate when I'm craving for it. Since I decided to make a sLITE change in my life, I thought why not come up with a guilt free ice cream recipe which would satiate my cravings and not make me get out of the house just to buy myself a cup? David Lebovitz had this recipe up on his site, and I tailor made it to fit into the sLITE lifestyle. I  also added a sprinkle of Tata salt lite to the recipe, to bring out the bittersweet taste. It literally takes 5 minutes to make the faux custard, and no churning at all! This may not be your friendly neighbourhood overtly sweet ice cream but it was still so good, I just had to share it with you guys!


A huge shoutout to the amazing folks over at Tata Salt Lite who are taking a great initiative with promoting the #slite lifestyle. You can look their pages up on Twitter and Facebook, or dial their toll free number to know more.

On to the nomness!

Guilt Free Sugarless 70% Dark Chocolate and Baileys Ice Cream.
Serves 2
Takes 5 minutes (+4 hours of freezing)
Adapted from David Lebovitz's blog.


Ingredients:

100 gm 70% Dark Chocolate (You can use any that you like)
1 cup milk (you can also use non fat or skimmed milk)
1 medium sized over-ripe frozen Banana
2 tbsp Cocoa Powder
90 ml Baileys (optional)
A dash of Vodka/Rum
A pinch of Tata Salt Lite

Method:

Melt the Chocolate and Cocoa into warm milk till uniform. You can do this over a pan on low heat, or in the microwave at 30 second bursts.
Blend together with all other ingredients till smooth.
Transfer to an air tight container and freeze for 4 hours or until set.
Scoop it out and sprinkle with Tata Salt Lite before serving.
Enjoy!

Note: we need to add alcohol to the recipe so that there is no crystallisation. You can omit the alcohol altogether, but know that the ice cream will be slightly hard in texture (like a Kulfi).

Friday, March 6, 2015

Recipe: Zucchini Fettuccine Salad with a Cashew Pesto dressing.


I am just realizing that my journey with Tata Salt Lite is coming to an end soon. I am so glad I did this, because it got me back my mojo, and it made me feel heard again. I am so grateful for all the love and support I have received from every single one of my readers, and with my blog recently crossing 1,50,000 hits, I have nothing to complain. You guys made this happen. Thank you so, so much. I have to celebrate this with something delicious, but not without my #sLITE change!


I had come across the recipe for Zucchini Spaghetti with Pesto and Buffalo Mozzarella last year over Twitter, and it has been fixed in my mind ever since. I have made numerous excuses to myself, right from Zucchini not being available in the market to 'I-don't-know-how-this-will-taste', from 'I'll-just-make-it-next-time' to 'It's-easier-to-make-an-omelet'. I stand corrected. This is hands down the easiest and yummiest Salad you'll ever come across. Bonus points because it is Vegetarian and a One-Up because it looks like Pasta.

Zucchini Fettuccine Salad with a Cashew Pesto dressing.
Serves 2
Takes 10 minutes

Ingredients:

1 large Zucchini
A handful of Cherry Tomatoes
4 cloves of Garlic
1/4 Cup Cashew Nuts
1 Cup Basil
Tata Salt Lite, to taste
Pepper, to taste
1/2 Cup Extra Virgin Olive Oil

Method:

Use a mandoline, peeler or spiralizer to shave Zucchini into your desired shape. I shaved super thin ribbons and cut them into thirds length-wise for Fettucine sized ribbons. You can also make Spaghetti using a spiralizer. Keep the Zucchini ready into a mixing bowl, in the refrigerator while you make the dressing.

Grind together Garlic, Pepper, Cashews and 1 tbsp EVOO (Olive Oil) until smooth. Then add in the Basil leaves, remaining EVOO and Tata Salt LITE to taste. Grind together till smooth. 

Pour the dressing over the Zucchini and toss to combine. Add in the cherry tomatoes. You can also tear up some fresh Mozzarella cheese if you fancy it. Serve immediately!


Wednesday, March 4, 2015

Recipe: Karwari Style Pan Fried Fish.


For those of you who don't know, I come from Karwar, a beautiful, touristy spot just ahead of the border between Goa and Karnataka (towards Karnataka). I was born and raised in Mumbai, but the annual visits back to Karwar to our ancestral home for Ganpati made sure I could indulge in the beauty of this little town. As a kid, I hated it - I was away from my home, my bed, my people and my life. I had to live in an old ancestral house full of people from everywhere and it was all quite a chore. As time went by, I grew to appreciate the serenity, and now its more of a much needed break from the fast paced city life, where you can just lay back and relax.

I have memories of my aunt cooking fresh Mackerel on the coals, and all of us cousins sitting in one straight line with our legs crossed, and as soon as she'd bring those beautiful fresh charred fish stuffed with homemade masala, topped with a squeeze of fresh Lemon, we would attack with our bare hands and go to omnomnomnom-land instantly. Time has gone by, there is no choolha at the ancestral house anymore, but we still bring some coals and char them Mackerels every time we visit.

Back here in Mumbai, Mom prepares her Signature Fish Curry (Dad won't eat any other) and saves some pieces for Fish Fry. My Dad likes them coated with Semolina Flour, crisp on the outside and loaded with flavour on the inside. I, on the other hand, like it just slathered with Masala, and pan fried with a touch of Oil. It tastes great while being super healthy, and I made a sLITE change by reducing the amount of oil, not coating it with any flour, and using low sodium Tata Salt LITE. I have used Halwa pieces here (Placed both kinds of fried fish, with and without semolina in the picture), but you can use the same Masala for any Fish, Prawns, Squids or even Chicken. Sometimes I eat an entire pan fried Pomfret for Dinner. Its high protein and guilt free, and super easy to prepare!

Karwari Style Pan Fried Fish
Serves 2
Takes 5 minutes (plus 30 minutes prep)

Ingredients:

Seafood of choice, cleaned and portioned (500 gm)
1 tbsp Chili Powder
1/2 tsp Turmeric Powder
Tata Salt Lite, to taste
Few drops of Lemon Juice
Few drops of Water
1 tbsp Oil

Method:

Mix all the dry ingredients in a flat plate. Add the lemon juice, 5-6 drops. Then add water, few drops at a time and mix with your fingers so as to obtain a paste-like consistency. Apply this paste to your seafood and massage thoroughly. Let it sit for 30 minutes in the refrigerator. Please wash your hands after this step, you're working with Chili Powder after all.

Heat up the Oil in a pan on High. Add in the Fish pieces and let them sear, about a minute each side. Once the pieces look like they're browning, turn the heat to low and let them go for 1.5 to 2 minutes on each side. Serve them with a squeeze of Lemon and lots of thinly sliced onions to go with!

Tuesday, March 3, 2015

Recipe: Good-for-you Smoothie!


Around a decade ago, I was diagnosed with Anemia. While this is a fairly common problem with the women, it definitely should not be ignored. Since I was training to be a pilot at that time, even though my Haemoglobin levels were almost normal, they needed to be optimal. I saw my family doctor, an Air Force doctor, a Haematologist, an Ayurvedic doctor, a Homeopathic doctor, I took injections, but nothing helped me boost it all. While my haemoglobin levels were inter-linked to other problems in my body, my mother decided to stop everything and go natural.

I would have fresh juice every day that would consist of Spinach, Beetroot, Ginger, Lemon, Mint, Coriander, Carrots, Bottle Gourd and Tomatoes. One month later, my Hb levels were optimal. As much as I loved the juice, it always gave me the medicinal feel for the reasons that I was having it. But as years went by and I resorted to drinking this magic juice before every medical examination, I noticed that my skin was better, digestion was better and I felt and looked great. Since then, I try and incorporate these juices in various forms on a regular basis into my diet, my favourite being a Smoothie. One sLITE change that makes a huge difference in my life.

The hot rage is the superfood Kale and it would only mean I have to try it in a Smoothie. So I experimented, and as expected, I was wowed. You can add in whatever fruits and greens you like, chances are you'd love them too! So here we go:

Good-For-You Smoothie
Serves 3
Takes 5 minutes

Ingredients:

1 Cup Kale leaves
1 Green Apple, chopped.
1 Cup Tender Coconut Water + Any pulp from the coconut.
A handful of Grapes
2 tbsp Flax Seed Powder (optional, if you like that Smoothie extra thick)
1/2 Cup Ice Cubes
A pinch of Tata Salt LITE
1 tbsp Honey (Optional. I did not add it)

Feel free to add in a handful of Spinach leaves, even some Walnuts, Cashews and even Basil Leaves. You can substitute the Tender Coconut Water with Almond Milk, Yogurt, Soy Milk, or even regular water. You will need Honey in this case. 

Method:

Process all the ingredients in a blender until smooth and fine. Enjoy!

Wednesday, February 18, 2015

Recipe: Sweet Potato Chaat


I don't know about you guys, but I am addicted to Chaat. I am guilty of consuming at least 3 plates of pani puri every week. It's like I just can't function without it. It keeps me sane. Yeah, it's that bad.

Meanwhile, I'm also trying to add the Chaat element to wherever it makes sense. My doctor asked me to make the SLITE change from Potato to Sweet Potato (seriously, it is loaded with non guilty carbs that will actually contribute positively towards your health with all those workouts) and I was like, hey, I can make this into a Chaat! The very famous Shakarkandi ki chaat on the streets in New Delhi is not just nostalgic, but very comforting! I made my version at home. You can too! Here's how:

Sweet Potato Chaat
Serves 4
Takes 30 minutes.


Ingredients:

500 gm Sweet Potato
A pinch of Tata Salt Lite
A pinch of pepper powder
A pinch of Aamchur powder (dried Mango)
A pinch of Chaat Masala
A pinch of Red Chili Powder
2 tbsp Green Chutney (optional)
1 tbsp Chopped Coriander
A squeeze of Lemon
1 tsp Olive Oil. (Not extra virgin)

Method:

Boil the sweet potatoes till tender. Peel and cut them into slices.

Heat up a pan on medium with the oil. Place the slices and cook till slightly brown on both sides.

While the potatoes are browning, mix all the powders together and keep them ready.

Once the potatoes are done, transfer them into a bowl and sprinkle with the powders while they're still hot. Toss to incorporate. Add in a squeeze of lemon. You can also add green chutney (green Chili, mint, coriander, lemon, sugar ground together) to this if you like. I did, and it tasted great! Also add in the chopped coriander for an extra dimension!

Serve warm or cold, tastes great either way! You can also serve this mixed with Yogurt, and can also add Sev as garnish. Yum.

We all have that one food item we cannot do without, right? I'd love to know yours, do let me know in the comments section!

Monday, February 16, 2015

Recipe: Kale Chips!


Kale is the new superfood in the market. Everywhere I go, every article I read, every video I watch, is gaga about Miss Kale. I just had to find out what the fuss was about, so I decided to make me some Kale Chips. But of course, I would not deep fry them. In order to make a SLITE change, I baked them instead, and sprinkled with low sodium Tata salt lite instead of the regular fare, and Oh My God! The possibilities with this recipe are endless! Not only are these chips nutritious, they can be your go-to for those midnight snack cravings, or while watching movies. They aren't crunchy, they're KRRUNNCHYYY (seriously, they make that sound while you eat them).


So what are we waiting for? Let's do this!

Baked Kale Chips
Serves 4 (Or 1. I really can't guarantee)
Takes 20 minutes.


Ingredients:

A bunch of Kale, washed, patted completely dry.
Tata Salt Lite, to season.
Pepper, to season.
A drizzle of Olive Oil. (Not Extra Virgin)
Any other seasonings (Chili flakes, brown sugar, sesame, Parmesan cheese, popcorn seasoning etc.)

Method:

Preheat oven to 170C/340F. Grease a cookie sheet or two with a tsp of Olive Oil.

Prep the Kale. We need to tear the Kale into bite sized pieces along the middle thick stem. Discard the thick stem. Please bear in mind that the chips will reduce in size as they bake, so tear accordingly. Transfer the leaves into a bowl.

Drizzle some Olive Oil and massage the Kale. You'll notice it will start to wilt a little. Season with Salt and Pepper, and any other seasoning you like. Massage well. Arrange on the cookie sheet such that the leaves are not overlapping one another. We want them to bake, not steam, and overlapping would make them steam.

Bake in the oven for 10 minutes or until bright green and crispy. Let it stay for a minute on the cookie sheet before you transfer them to your serving bowl. These don't stay very long as they're a crowd pleaser, but if you do intend on storing them, a brown paper bag would be a good bet!

I baked half of them with Salt and Pepper, and the other half with Chili Oil and Brown Sugar and mixed the two. We're having a lot of fun munching on the mixed goodness here at home!

Enjoy!

Saturday, February 14, 2015

Recipe: Ranch Style Hummus


Have you ever made something at home that turned out so amazing you had tears in your eyes? Like, it's so unbelievable that you had to take a moment of silence just to absorb the awesomeness of the dish? Yes, that happened to me when I made this Hummus recipe. Initially I was skeptical, since it omits one of the most important ingredients from the traditional Hummus, the Tahini. Instead of that we add in Greek Yogurt to make this supremely creamy, light, yet delicious portion of Hummus that contains just over half of the calories as compared to the traditional version (173 v/s 280) and that is very good news for Hummus binge eaters like yours truly.

Once you have your Garbanzo beans ready, all it takes is less than 5 minutes. Serve it with freshly cut sticks of Zucchini and Carrots instead of the regular Pita, a SLITE change that will make you love your healthy eating spree even more!


Ranch Style Hummus
Serves 4
Takes 5 minutes (plus cooking time for the Garbanzo beans, if any)
Recipe credit: adapted from bodybuilding.com

Ingredients:

1 can of Garbanzo Beans aka Chickpeas. (I soaked 1.5 cup overnight and cooked them in the pressure cooker for 4 whistles).
6 cloves of Garlic
Tata Salt Lite, to taste
Juice of 1 Lemon. I used a Meyer lemon, so I used half.
1/2 cup Greek Yogurt
1/2 Cup (or more) good quality Extra Virgin Olive Oil.
Paprika, for garnish.

Method:

In a food processor, throw in all the ingredients except Extra Virgin Olive Oil and Paprika. Process till smooth. Then drizzle Olive Oil until you have a uniform, creamy consistency. I like my hummus a little runny so I adjusted accordingly. Taste and check if salt is okay.

Transfer to a serving bowl and make a well in the middle, fill her up with EVOO, and sprinkle with Paprika. Serve with Pita, Lavash, Vegetables, or if you're hummus crazy like me, eat it as is, by the spoonful!

I know you guys will try this one, waiting for feedback!

Wednesday, February 11, 2015

Recipe: Durum Wheat Pasta and Tuna Salad with a Greek Yogurt Dressing.


There are days when one gets tired of the whole healthy eating thing. That's what cheat days are for. But sometimes you feel like extending your cheat days by a day or two just because you're so used to the usual eggs and chicken and smoothies. This pasta recipe is for one of those days. Not only is it delicious, it will also leave you wanting for more! 

I made the dressing with Greek Yogurt and to my pleasant surprise it tasted perfectly creamy and not overtly tangy. I also used Extra Virgin Olive Oil in the dressing. A little note here, please do not use EVOO for cooking purposes. It is purely meant for drizzling over salads and pastas and adding to your dressings. Olive Oil generally has a low smoking point, and even lower in the case of EVOO, so please beware. Of course, I have made it just a wee bit healthier by using a low sodium salt which makes our life easier while making zero compromises with the taste of the dish.


Pasta and Tuna Salad with a Greek Yogurt Dressing
Serves 4
Takes 30 minutes

Ingredients:

250 gm Whole Wheat/Durum Wheat Pasta
1/2 cup Greek Yogurt
A can of Tuna. Mine was Light Mayo based.
1 Medium Onion, sliced
1 Medium Tomato, Diced
Green Olives, halved and pitted , as per preference.
A handful of mixed balanced veggies (I used Carrot and French Beans)
1/3 cup Extra Virgin Olive Oil
Tata salt lite, to taste
Pepper, as desired
Coriander/Parsley leaves to garnish

Method:

Cook the pasta as per packet instructions. Drain, wash well with cold water. Let it drain again. Transfer to a mixing bowl and toss in a tbsp of EVOO.

Add in the onions, tomatoes, carrots, French beans, olives and any other vegetables that you like (feel free to use lettuce, celery, corn, even finely chopped boiled eggs!)

For the vinaigrette, whisk together the EVOO, Greek yogurt, Tata salt lite and pepper. Pour over the pasta and toss to combine.

Garnish with coriander or parsley leaves, and drizzle with olive oil. Serve chilled or at room temperature. 

Monday, February 9, 2015

Recipe: Oat and Strawberry Smoothie.


There are days when you just don't wanna do anything. Going to work, heading for workout, talking on the phone, sending and receiving emails, none of that. No cooking either. But then you feel hungry and while Chinese delivery seems feasible, your trainer's face flashes in front of your eyes and you decide to stick to a sandwich. Or else, you make this smoothie.


I used Oats for this Smoothie, that give them a very thick texture, and while I prefer it that way, you can always make it thinner with some milk. You can also substitute milk with yogurt, soy milk or almond milk. I am very happy to report that these SLITE changes I've made in my life have really been showing results, and that makes me very very happy!

Oat and Strawberry Smoothie
Serves 2
Takes 5 minutes


Ingredients:

A handful of Strawberries
1 Banana
1/2 cup Oats
1 cup cold Milk/Soy milk/Almond milk
1 tbsp Honey (optional)

Method:

Mix the oats with milk and microwave for 10 seconds.

Add them along with all the remaining ingredients to a blender and blitz till smooth. Thin with milk if required. Serve chilled!

Sunday, February 8, 2015

Recipe: The Perfect Scramble


I say this in every blog post of mine that features eggs, and I'll say it in this one too. I love eggs. I'm the kind of person who eats breakfast for dinner. So you can only trust me blindly when it comes to whacking out a good egg based breakfast out of my kitchen. I watched Ina Garten make this recipe on her show few years ago, and I have still been making it regularly. 

These scrambled eggs are absolutely yummy, and a staple as my breakfast and breakfast for dinner menu. I used Tata salt lite to make them low sodium. I did use butter in the recipe, but hey, you earn that pat of butter when you workout like a beast at the gym!

The perfect Scramble
Serves 1 as a healthy portion
Takes 5 minutes
Recipe credit: Ina Garten on Food Network

Ingredients:

3 Eggs
A splash of milk or cream
A pat of butter
1 tsp Oil
Tata salt lite, to season
Pepper, to season
Mixed herbs and Chili flakes to taste

Method:

Whisk your eggs in a bowl with salt and milk/cream until they're nicely frothy.
Heat up a non stick pan on medium low. Once it's heated up, turn the heat down to low and add the oil, followed by half of the butter.
Pour the whisked eggs in. You'll see they start to cook from the edges. Bring the edges in the middle and keep whisking every 10 seconds. Repeat this until you have a gorgeously soft and fluffy scramble. 
Now add in the remaining butter to make it luscious and glossy, and finish with a crack of pepper, herbs and Chili flakes. Serve warm.

I served mine up with Garlic Bread slices and half a grilled a Tomato. It was gone in 5 minutes or less ☺️

How do YOU like them eggs? 

Wednesday, February 4, 2015

Recipe : Brown Rice Pulao. Coz Rice bhi healthy hota hai!


How many people have asked you to steer clear of rice if you wanted to be healthy? How many people went "Chawal mat khana, Roti pel lo"? Well, I have a lot to say to those people, about rice, but I'm going to save it for another post. Meanwhile, Brown Rice is a super food you cannot miss out on. Not only is it high in Fiber, Brown Rice is also rich in Magnesium that contributes towards healthy and stronger bones, along with Calcium, of course. It also helps with contraction of muscles and strong teeth. Brown Rice needs to be soaked before cooking, just so that it would absorb the moisture and not have a bite to it (unless you like it that way).


Load your body with this super simple complex carb rich in glucose, and do not forget to use low sodium Tata Salt Lite to make it even better! I must say, I am delighted that I am getting the chance to share so many healthy recipes with you guys and the driving force behind is the campaign by these amazing guys that urges us to make a SLITE change in our lives. A little goes a long way!

Brown Rice Pulao
Serves 2
Takes 20 minutes


Ingredients:

1 medium Onion, sliced.
1 tbsp Ginger Garlic Paste
3/4 Cup Brown Rice
1.5 Cups Water
1 tsp Cumin Seeds (jeera)
A pinch of Asafoetida (heeng)
1 tbsp Ghee, you can also use Canola Oil.
A handful of mixed vegetables. I used Cauliflower, Carrots, Beans and Peas
10 Raisins
Tata Salt Lite, to taste
1 tsp Red Chili Powder (add more if you like it spicy)
1/2 tsp Garam Masala Powder

Method:

Soak the rice in water for 30 minutes.
Heat up a pressure cooker on medium. Add Ghee/Oil.
Add in cumin seeds and asafoetida followed by Onions. Sauté till translucent.
Turn the heat to medium high, add in the mixed veg and ginger garlic paste. Mix to combine. Now add in the Red Chili powder and mix for 1 minute.
Give the brown rice and water mixture a stir and pour it into the cooker. Season with salt, and add raisins and garam masala. Mix everything well and cook for 2 to 3 whistles (or how much ever long it takes for normal rice to cook in your pressure cooker).
Open the cooker after 20 minutes of turning the gas off, and fluff the rice with a fork.
Serve hot, with chilled Yogurt!

Bon appetite!

Monday, February 2, 2015

Recipe: Balsamic Mushrooms!


We all have that one dish we love, that we can never get enough of. For me, this is the one. Other than being supremely delicious, it is also nostalgic for me. When I was training to be a commercial pilot, we had a small canteen at the municipal airport. An old lady named Cathy would make the most amazing breakfast for us. While everything on her menu was filled with bags of flavour, my most favourite was her Cajun Chicken Sandwich. It was a huge sandwich where there was Cajun Chicken, balsamic mushrooms and caramelised onions between a freshly baked Ciabatta bread. The sandwich would be so generously filled with mushrooms, that they spilled all over. So I started reserving the filling to add to my eggs during lunch *student life*. Soon I started making my own, and till date I send out happy thoughts to Cathy every time I make these mushrooms.

With the addition of a low sodium salt to the recipe, it makes no difference to the taste but instead you eat smarter and healthier. I am loving the sLITE change I have made to my lifestyle. Gone are the bloated mornings! Don't forget to count in proper hydration as well!

Balsamic Mushrooms
serves 2
Takes 10 minutes

Ingredients:

300 gm mushrooms of your choice, cleaned with a damp napkin and chopped into bite sized pieces.
1 medium onion, sliced
Tata salt lite, to taste
1 tbsp Balsamic vinegar
A dash of Tabasco
Chili flakes, optional
1 tbsp Olive Oil

Method:

Heat a non stick pan on high. Add in the Oil, then throw in the Onions and Chili flakes.
Cook the onions till they're translucent. Add in the mushrooms and sprinkle with salt.
The mushrooms will start releasing their moisture and shrinking in size. Add a dash of Tabasco and toss it all together. Finally add the balsamic and let it cook for another minute. Serve as is, or put it on your sandwich, or make it healthier by eating it with boiled eggs like I did! 

Friday, January 30, 2015

Recipe: Cauliflower Couscous. When Couscous went Paleo!


I'm so grateful that Tata Salt Lite actually gave me the opportunity to speak for the cause, since I had been going through a writers block for the longest time. Since leading a fit and healthy lifestyle is a choice that I have made, this bodes well for me as well as my readers (I hope!) these little changes actually make a big difference in our lives. You can totally avoid the sodium loaded French fries when you go out to eat and opt for the humble baked potato without salt, and sprinkle your own low sodium salt on it as required. I have noticed that I am able to click better selfies, my clothes fit better, and I feel less lethargic when I keep my sodium intake in check. Of course, it's a little bit of everything like I always say. Eating healthy, working out and keeping your water intake and nutrition in check.

To tell you a little bit about what Paleo is, Paleo is short for Paleolithic lifestyle. I am not going to call it a diet, because it isn't. It's a lifestyle. We eat what our ancestors ate in the Paleolithic times. I have what you call a semi Paleo lifestyle, what with the food writing and everything else. But it does help me make an informed decision about what I'm eating. If you're interested, Google it right away!

Since couscous is a refined carb, I used Cauliflower as couscous for this recipe since its unrefined and is more nutritious, and also easier to digest for our body. I make this recipe so often that it is a house favourite! The gentle crunch of the cauliflower, the sweetness from the raisins, the saltiness from the olives and the smokiness from the chili flakes makes this a perfectly balanced treat!


Cauliflower Couscous
Serves 2
Takes 15 minutes
Recipe credit: watched on food network


Ingredients:

250 gm Cauliflower florets
1 shallot, finely chopped
1 tbsp Lemon Juice
5-6 Olives, roughly chopped
Mixed nuts, roasted on a pan. I used almond and pistachio slivers
15 Raisins/ Cranberries
Tata Salt lite, to taste
1 tsp Chili flakes
A handful of chopped coriander
1 tbsp Olive Oil
Extra Virgin Olive Oil, to drizzle on top

Method:

Pulse the cauliflower florets in a blender till they resemble the texture of couscous.

Heat a pan on medium high, add oil. Start with the shallots and chili flakes and give them a minute till they are sweet and translucent. Add in the cauliflower and sauté for 2 minutes.

Season with Tata salt lite, and sprinkle some water over the cauliflower. Cover the pan and turn the heat to low. Let it cook for 2 minutes. Lift the lid and give it a good mix.

Transfer to a plate and top with the nuts, olives, lemon juice, raisins, coriander and drizzle generously with extra virgin olive oil. You can add anything else you like, for example cumin powder, sumac, even grilled Apple would taste great!

Let me know how you like this!

Tuesday, January 27, 2015

Recipe: The Whatever-You-Get Braised Omelet.


Off late my schedule has been full of eggs. I'm an egg lover, but I may have exaggerated myself when I said I could eat eggs for every meal. It gets repetitive after a while and one can easily get bored. That's when the real challenge sets in. What sets the challenge in the Iron-Chef-America mode is being pressed for time, multitasking.

The best thing about eggs are that they are so versatile, you can almost add them to anything- a stir fry, rice, or a simple scramble or omelet. The quickest and easiest version of eggs with an attitude is what I call the Whatever-You-Get Omelet.

As for braising, after spending over a decade trying to perfect the omelet, watching them serve me a perfect one every time at leisurely brunches and breakfast buffets and me trying to replicate the same only to end up with brown omelet every single time, I have resorted to braising my eggs and they're perfect every time. Braising is basically cooking your eggs in steam, and you'll end up with the best omelet ever if you get it right!

The Whatever-You-Get Braised Omelet
Serves One
Takes 10 minutes

Ingredients:

2 whole eggs/ 4 egg whites.
1 tsp Oil + 1 tsp Oil.
Tata Salt LITE to taste (low sodium)
Pepper to taste
Whatever you get. (Seriously. You can add some leftover Chicken or Veg. Mixed greens are a great option too. I used Broccoli, Lettuce and Spinach, some shredded chicken and half a Tomato. You can go as crazy as you like, be it mushrooms, different kinds of cheese, boiled Corn kernels,even leftover rice sautéed in spices!)
A slice of Cheese. I used White Cheddar
A splash of milk (approximately 1 tbsp)

Important apparatus: a non stick pan with a lid.

Recipe:

Whisk the eggs with Milk, Salt and Pepper. Set aside.
Heat up the non stick pan on medium high heat. Prep the veggies and keep them ready. Also keep the Cheese peeled and ready (you're welcome, bachelor readers, I'm laying it out step by step for you :P )
Add 1 tsp Oil to the pan followed by Chili flakes and veggies. turn heat to high and sauté for 2 minutes. Remove in a separate plate.
Put the pan back on heat and turn the heat to low. Pour the omelet mixture in and stir lightly in the pan. Gently whisk around, and then top with all the yummy veggies that have been sautéed, chicken, cheese, herbs!
Sprinkle few drops of water around the insides of the pan and immediately cover it. Let it stay for 3 minutes. The steam generated from the sizzling water will braise the omelet and will cook it from the top as well.
Remove the lid, and transfer the cooked omelet to a plate. If you think the omelet is too runny for you, give it a couple more minutes with a covered lid.
I drizzled the top of my omelet with Chili infused olive oil and had it as is, so filling, so healthy!

Friday, January 23, 2015

Recipe: Orange and Sesame Chicken. Bring a sLITE change in your life.


Ever since I've made the switch to leading a healthier lifestyle, my brain has been in an involuntary overdrive, analysing what I'm eating during any time on a given day. When I cheat, I go all out. But other than that I am mostly eating a high protein and fat diet along with smart carbs. What are smart carbs, you ask? Well, just eating smartly. For example, I load on carbs within 30 minutes of finishing a mean workout at the gym. I'll be explaining this in greater detail in the forthcoming blog posts.

One other important detail I have been consciously looking at is the amount of Sodium I consume on a daily basis. Most of the packaged food we eat today is loaded with Sodium and that isn't good for our body. For example, a small packet of chips contains approximately 150 calories per serving but the quantities of Sodium and Carbs, especially the ones derived from Sugar, is quite alarming. The added disadvantage of Sodium rich foods promoting water retention just makes matters worse (AKA- can't-pose-for-a-selfie-coz-my-face-looks-bloated syndrome).

I have been trying to make a conscious effort in trying to cook my own meals these days. At least I can control the amount of how much of what goes into what I am cooking. I have made the switch from normal salt to a low sodium salt and even so, I try limiting my salt intake as well. 

This healthy eating spree begins the series of some healthy recipes I cook, from my kitchen to yours :)

Orange and Sesame Chicken.

Ingredients:

200 gm Chicken cut into medium small pieces
Tata Salt Lite (low Sodium)
Pepper
1/4 C fresh Orange Juice (I recommend fresh, but you can use bottled juice as well)
some Orange Zest
1 tsp Vinegar
1 tsp Soy
1 tsp Demarara Sugar
1 tsp Garlic minced
1 tsp Ginger minced
1 tsp Corn Starch
1/4 C Cold Water. 
2 Tbsp Oil
Sesame Seeds, toasted.

Method:

Heat up a flat pan on medium high flame. Add Oil.
Coat and massage the Chicken pieces with Salt and Pepper.
Add to the Oil and sear on all sides. Keep turning. About 5 minutes. 
In the mean while. Mix all other ingredients in a bowl, except water and corn starch. Mix the corn starch and water separately in another bowl. 
After the chicken is golden, Pour both mixtures to the chicken and stir well. Reduce heat to low and let it go for 7 minutes more. Stir occasionally. 
Garnish with toasted Sesame seeds and serve warm (not piping hot) over rice/brown rice! As for me, I ate it as is :)

Do let me know how it turned out for you!

Older Posts Home

LinkWithin