Showing posts with label Recipe. Show all posts

Wednesday, November 4, 2015

Recipe: Toffee Bananas. An initiative for #SeedTheRiseChallenge by Mahindra Rise.


Some recipes remind you of a certain moment. They take you back in time, and transport you to the exact place, the exact feeling, the exact fragrance. Much like the scene from the movie Ratatouille where the food critic takes one bite of the dish and is instantly transported to his childhood. I have a similar story to share.

When I was a kid, we used to travel by train to and from our native place, Karwar. It was an annual visit for Ganesh Chaturthi, back in the day when all the "modern" things were still not available in villages so we used to carry everything for everyone from Mumbai, and it wasn't possible to take it all on a flight. We used to travel by Nethravati Express as it was one of the only trains that had a pantry. The main reason was the delicious fried Bananas that were sold on the train, fresh out of the pantry, and it was something me and my brother looked forward to every year!

Years passed by, convenience took over everything else and we started taking flights every year. The memories of the fried Bananas got lost somewhere till I was watching an episode of Food Safari on TV and someone cooked Toffee Bananas. It was an instant trip to the train journeys and the happiness. I just knew I had to recreate this.
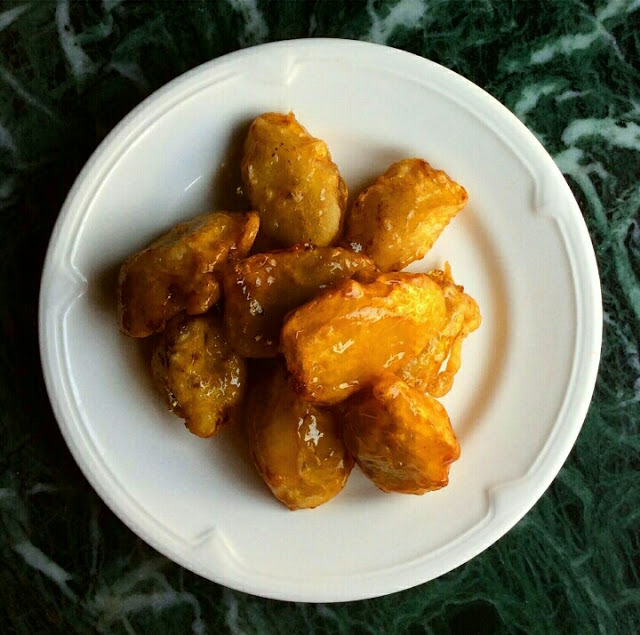


Call it the perfect opportunity, but #SeedTheRiseChallenge happened just at the right time for me. We are paying homage to the hardworking farmers of India and celebrating with recipes of ingredients that are largely produced on our soil. Bananas had to top the list, and I knew I had to make these! Seed The Rise Campaign is a crowdfunding initiative set up by Mahindra to help improve the lives of Indian farmers who have been betrayed by the bad weather. Working with 5 NGO-led projects across India, the campaign is looking to raise Rs. 2 crores in public donations. What's more - each donation will be matched by Mahindra to double the benefit for the farmers. Check out their website to know more or to donate  http://bit.ly/1ROiYCC. You can also watch their TVC here: https://www.youtube.com/watch?v=rlS2VrSEIdE 

Coming back to the recipe, it is super quick, ready in 30 minutes from start to finish, and is so easy that it is almost unfair for something so easy to be this delicious! Here it goes:

Toffee Bananas
Serves 2
Takes 30 minutes
Recipe credit: Darwin from Food Safari

Ingredients:

2 Bananas
1/2 Cup Flour
2/3 tsp Baking Powder
A pinch of Salt
1/2 Cup Corn Flour, plus a little extra for dusting.
1/3 Cup Cold Water
Oil for frying
1/2 Cup Sugar
Ice, for ice bath.
Method:

Heat a pan for frying, with a level of about an inch of Oil.

Mix the flour, baking powder, salt and corn flour in a bowl. Add cold water and mix the batter by hand, so as to not form lumps. It should be a thick consistency, but also easy to pour.

Chop the Bananas as per preference. I chopped them diagonally into thick slices. Take some corn flour in a plate and dredge the banana slices in it. This helps the batter stick to the otherwise slimy Banana slices.


Once the Oil is heated, coat the Banana slices with the batter and fry till golden on both sides, about 3-4 minutes. Don't crowd the pan with too many slices, as that can lower the oil temperature. 4 slices at once is a good amount! You may need to adjust the consistency of the batter with cold water as you go, it tends to thicken as it sits.

Drain the fried Banana slices on a paper towel. Mean while, heat up the sugar on medium in a non stick pan. Add few drops of water if desired, and wait patiently till it turns into a gorgeous golden caramel.


While this happens, ready a bowl with lots of ice and water and keep ready.

Once the caramel is ready, add few slices of the fried Bananas to it, coat them well and immediately add them to the ice bath. Repeat till all slices are done. The ice water shocks the caramel and turns it into a super crispy exterior.


And that is it! Toffee Bananas are ready. Just imagine biting into these crunchy goodies that are oozing with melt-in-the-mouth Banana goodness inside! I recommend all of you to try it soon! :)
Friday, March 20, 2015

Two Recipes with Dal! Dhokla and Mulligatawny Soup!


Did you guys know that World Water Day is around the corner? I, for one, have been in the water-wasters club for many years, with brushing my teeth leaving the tap on. While this is one of the major habits one needs to change in order to conserve water, there are many more (especially in the kitchen) which won't take much getting used to and will in turn impact our water conservation practices in a hugely positive manner. Here are a few:

1. You do not need to use a lot of water while boiling vegetables. The idea is for the water to just cover the vegetables in it. Instead of pouring out the water, you can use that flavourful Vegetable Stock in place of water while cooking your next meal!

2. Don't use water to defrost food. You can just leave the frozen food in the fridge overnight instead!

The good folks over at Tata I-Shakti have taken a great initiative during this #WorldWaterDay to make everybody aware of these little things, while also talking about their wholesome unpolished Dals. I have made the switch recently, and I could not be happier. Not only does 1 cup yield more Dal as compared to polished Dal, these Dals only require 2 cycles of rinsing as opposed to 4 times with the regular polished variety. Not to forget that the Polished Dals also are stripped off of their nutritional content.


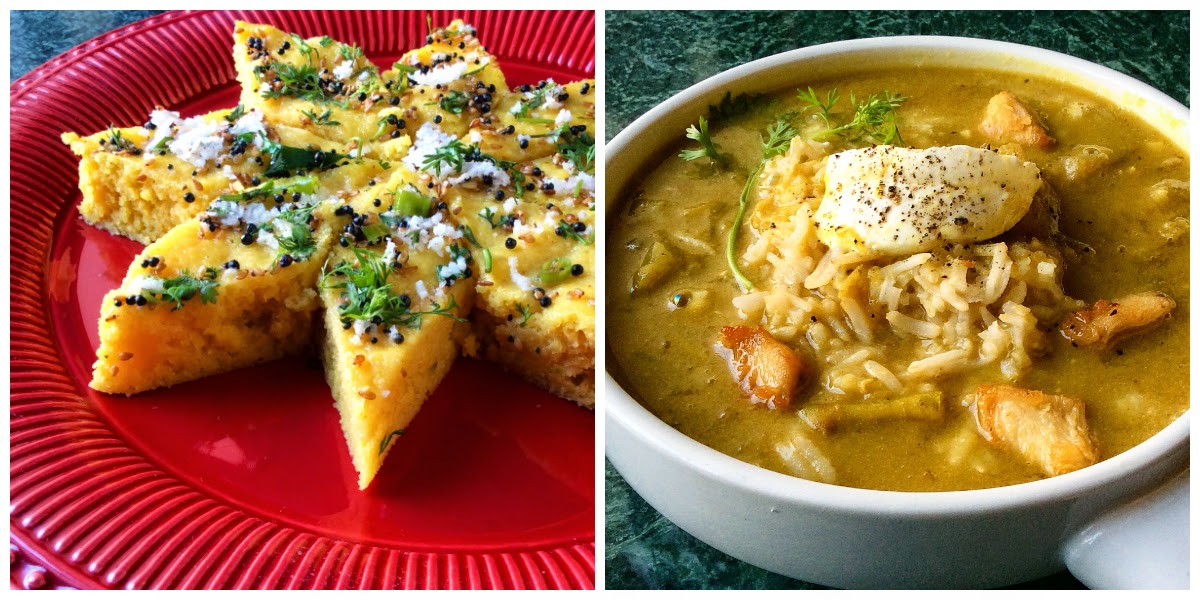
On this blog post I will be sharing 2 recipes from my kitchen, that waste minimal amount of water. First one is a healthy take on the globally favourite Dhokla, which I have been making with Moong Dal off late. Not only is this healthier, I have used the soaking water to blend the soaked Dal, instead of pouring it down the drain and replacing with fresh water.


The second recipe has a story of its own. It is the world famous Mulligatawny soup. Mulligatawny soup comes from Mooluga Thanni, which literally translates to Pepper Water. It was served to the soldiers during the British Raj in India, just because they demanded there be a Soup course. Well, the British left, they took the recipe with them, and heavily anglicized it to suit their palate. They added meat to the soup, thickened it with Coconut Milk, but I am not complaining, for I am a huge fan of this dish! It may be a bit lengthy but it is really easy, and the final product will blow your socks off. I guarantee it.

So, without further ado, I present these two recipes to you, one by one!


Recipe: Moong Dal Dhokla
Serves 6
Takes 20 minutes plus 4 hours soaking time.


Ingredients:

1 cup Tata I-Shakti Moong dal.
2 cups Water
An inch of ginger
2 Green Chilies
2 tsp Salt
1 tsp Red Chili Powder
1/2 tsp Turmeric Powder
A pinch of Asafoetida (heeng)
1 tsp Oil plus some more for greasing
1 tsp Eno Fruit Salt or Baking Soda

For the Tempering:

1.5 tbsp Oil
1 tbsp Mustard Seeds
1 tbsp White Sesame Seeds
2 Green Chilies, Chopped
6 Curry Leaves
A pinch of Asafoetida
3/4 Cup Water
1 tbsp Sugar (optional)

For Garnishing:

A handful of Coriander leaves, chopped.
A handful of Grated Fresh Coconut, scraped.

Method:

Soak the Moong Dal in 2 cups of water for 4 hours. Drain it but reserve the water.

Grind it in a blender with the Chili and Ginger. Use the reserved water (add more if desired) to get the pouring consistency like that of a Dosa.

Set up your steamer on the stove. Grease the steaming plate with Oil. I used 2 flat plates.

In the mean while, mix in the Turmeric, Red Chili, Asafoetida, Salt and Oil and give it a good stir. Just before adding into the steamer, add in the fruit salt and mix well with a steel spoon such that the batter is fluffy. Pour it into the two plates and set them in the steamer.

Steam for 12 to 15 minutes, then turn the heat off and let it stay for another 2 minutes. In the mean while, make the tempering.

Heat up a small pan with the Oil. Add in the mustard seeds, when they pop add the Asafoetida and the chopped chilies, followed by sesame seeds and then curry leaves. Let them splatter. Top this up with water and Sugar if desired, and let the mixture come to a boil. Turn the stove off and keep this aside. You can choose to skip the water soaking step, but I like my Dhoklas moist.

Remove the Dhokla from the steamer and cut them into desired shapes. Soak them with the water from the tempering, and add the tempered goodness all over them. Garnish with Coriander leaves and grated coconut. Serve with chutney!


-----------------


Recipe: MulliGatawany Soup
Serves 4 to 5
Takes 1 hour
Ingredients:

An inch of ginger
6 cloves of Garlic, finely minced
1 large Onion, finely chopped
1 Green Apple, peeled and diced.
½ Jalapeño, finely chopped (optional)
2 tbsp flour
½ tbsp. Coriander Powder (Dhania Powder)
1 tsp. Cumin Powder (Jeera Powder)
 ¾ tsp. Turmeric Powder (Haldi)
4 cups chicken stock or vegetable stock (You can use 4 cups of normal water, and add a stock cube to the masala while cooking, or you can also use plain water)
¾ cup Tata I-Shakti Red Lentils (Masoor Dal)
A handful of Coriander leaves, chopped.
½ cup Coconut Milk
Salt and Pepper, to taste
4 tbsp Oil
A cup of cooked Basmati Rice (You can substitute with Brown Rice for a healthier alternative)
A dollop of Yogurt, to garnish.

Method:
Soup: Heat 2 tbsp Oil in a deep pan over medium high heat. Sauté the Ginger, Garlic, Onion and Jalapeño until the Onions are translucent. Add in the Apples and give them a minute, then add Coriander Powder, Cumin Powder and Turmeric Powder and stir till the masala blooms. At this point, also add in the Stock Cube if you're planning to use one. Top up with Water/Stock and pour in the Red Lentils. Let this come to a boil.

Turn the heat to medium low, cover the pan and let this go for 30-45 minutes, until the Dal gets cooked. Throw in the chopped Coriander leaves. Purée 75% of the ingredients to a smooth velvety goodness, while letting the remaining 25% be chunky, for a superb textural contrast. You'll thank me later!

Return the soup to the pan on a low heat, and add in the Coconut Milk. Give it 3-4 minutes, then season with Salt and a generous cracking of Pepper.

To Serve: Place a small handful of boiled/cooked Rice in each bowl, and top it up with Soup. Garnish with a dollop of Plain Yogurt. You can also add a squeeze of Lemon Juice. People also serve this 'best-soup-they've-ever-had' with pan fried/roasted Cashews or Almond slivers. I'm salivating already.

Note: You can make this recipe with Chicken as well (traditionally it is made with Chicken), in which case you will need 200 gm of Chicken sliced into cubes. Pan fry them before you start the Soup process, for 90 seconds on each side, and remove them. Continue with the Soup recipe as above. Throw the Chicken pieces in along with the Coconut Milk at a later stage and cook for 6 minutes instead of 3! I made mine with Chicken :)

Tuesday, January 27, 2015

Recipe: The Whatever-You-Get Braised Omelet.


Off late my schedule has been full of eggs. I'm an egg lover, but I may have exaggerated myself when I said I could eat eggs for every meal. It gets repetitive after a while and one can easily get bored. That's when the real challenge sets in. What sets the challenge in the Iron-Chef-America mode is being pressed for time, multitasking.

The best thing about eggs are that they are so versatile, you can almost add them to anything- a stir fry, rice, or a simple scramble or omelet. The quickest and easiest version of eggs with an attitude is what I call the Whatever-You-Get Omelet.

As for braising, after spending over a decade trying to perfect the omelet, watching them serve me a perfect one every time at leisurely brunches and breakfast buffets and me trying to replicate the same only to end up with brown omelet every single time, I have resorted to braising my eggs and they're perfect every time. Braising is basically cooking your eggs in steam, and you'll end up with the best omelet ever if you get it right!

The Whatever-You-Get Braised Omelet
Serves One
Takes 10 minutes

Ingredients:

2 whole eggs/ 4 egg whites.
1 tsp Oil + 1 tsp Oil.
Tata Salt LITE to taste (low sodium)
Pepper to taste
Whatever you get. (Seriously. You can add some leftover Chicken or Veg. Mixed greens are a great option too. I used Broccoli, Lettuce and Spinach, some shredded chicken and half a Tomato. You can go as crazy as you like, be it mushrooms, different kinds of cheese, boiled Corn kernels,even leftover rice sautéed in spices!)
A slice of Cheese. I used White Cheddar
A splash of milk (approximately 1 tbsp)

Important apparatus: a non stick pan with a lid.

Recipe:

Whisk the eggs with Milk, Salt and Pepper. Set aside.
Heat up the non stick pan on medium high heat. Prep the veggies and keep them ready. Also keep the Cheese peeled and ready (you're welcome, bachelor readers, I'm laying it out step by step for you :P )
Add 1 tsp Oil to the pan followed by Chili flakes and veggies. turn heat to high and sauté for 2 minutes. Remove in a separate plate.
Put the pan back on heat and turn the heat to low. Pour the omelet mixture in and stir lightly in the pan. Gently whisk around, and then top with all the yummy veggies that have been sautéed, chicken, cheese, herbs!
Sprinkle few drops of water around the insides of the pan and immediately cover it. Let it stay for 3 minutes. The steam generated from the sizzling water will braise the omelet and will cook it from the top as well.
Remove the lid, and transfer the cooked omelet to a plate. If you think the omelet is too runny for you, give it a couple more minutes with a covered lid.
I drizzled the top of my omelet with Chili infused olive oil and had it as is, so filling, so healthy!
Older Posts Home

LinkWithin